Transforming a house into a home is a journey of creativity, sweat, and a little bit of magic. When we first walked through the front door of our home, it was love at first sight—but the mustard yellow walls and mismatched tiles had to go. Here’s how I turned our great room into the heart of our home.
The First Glimpse of Potential
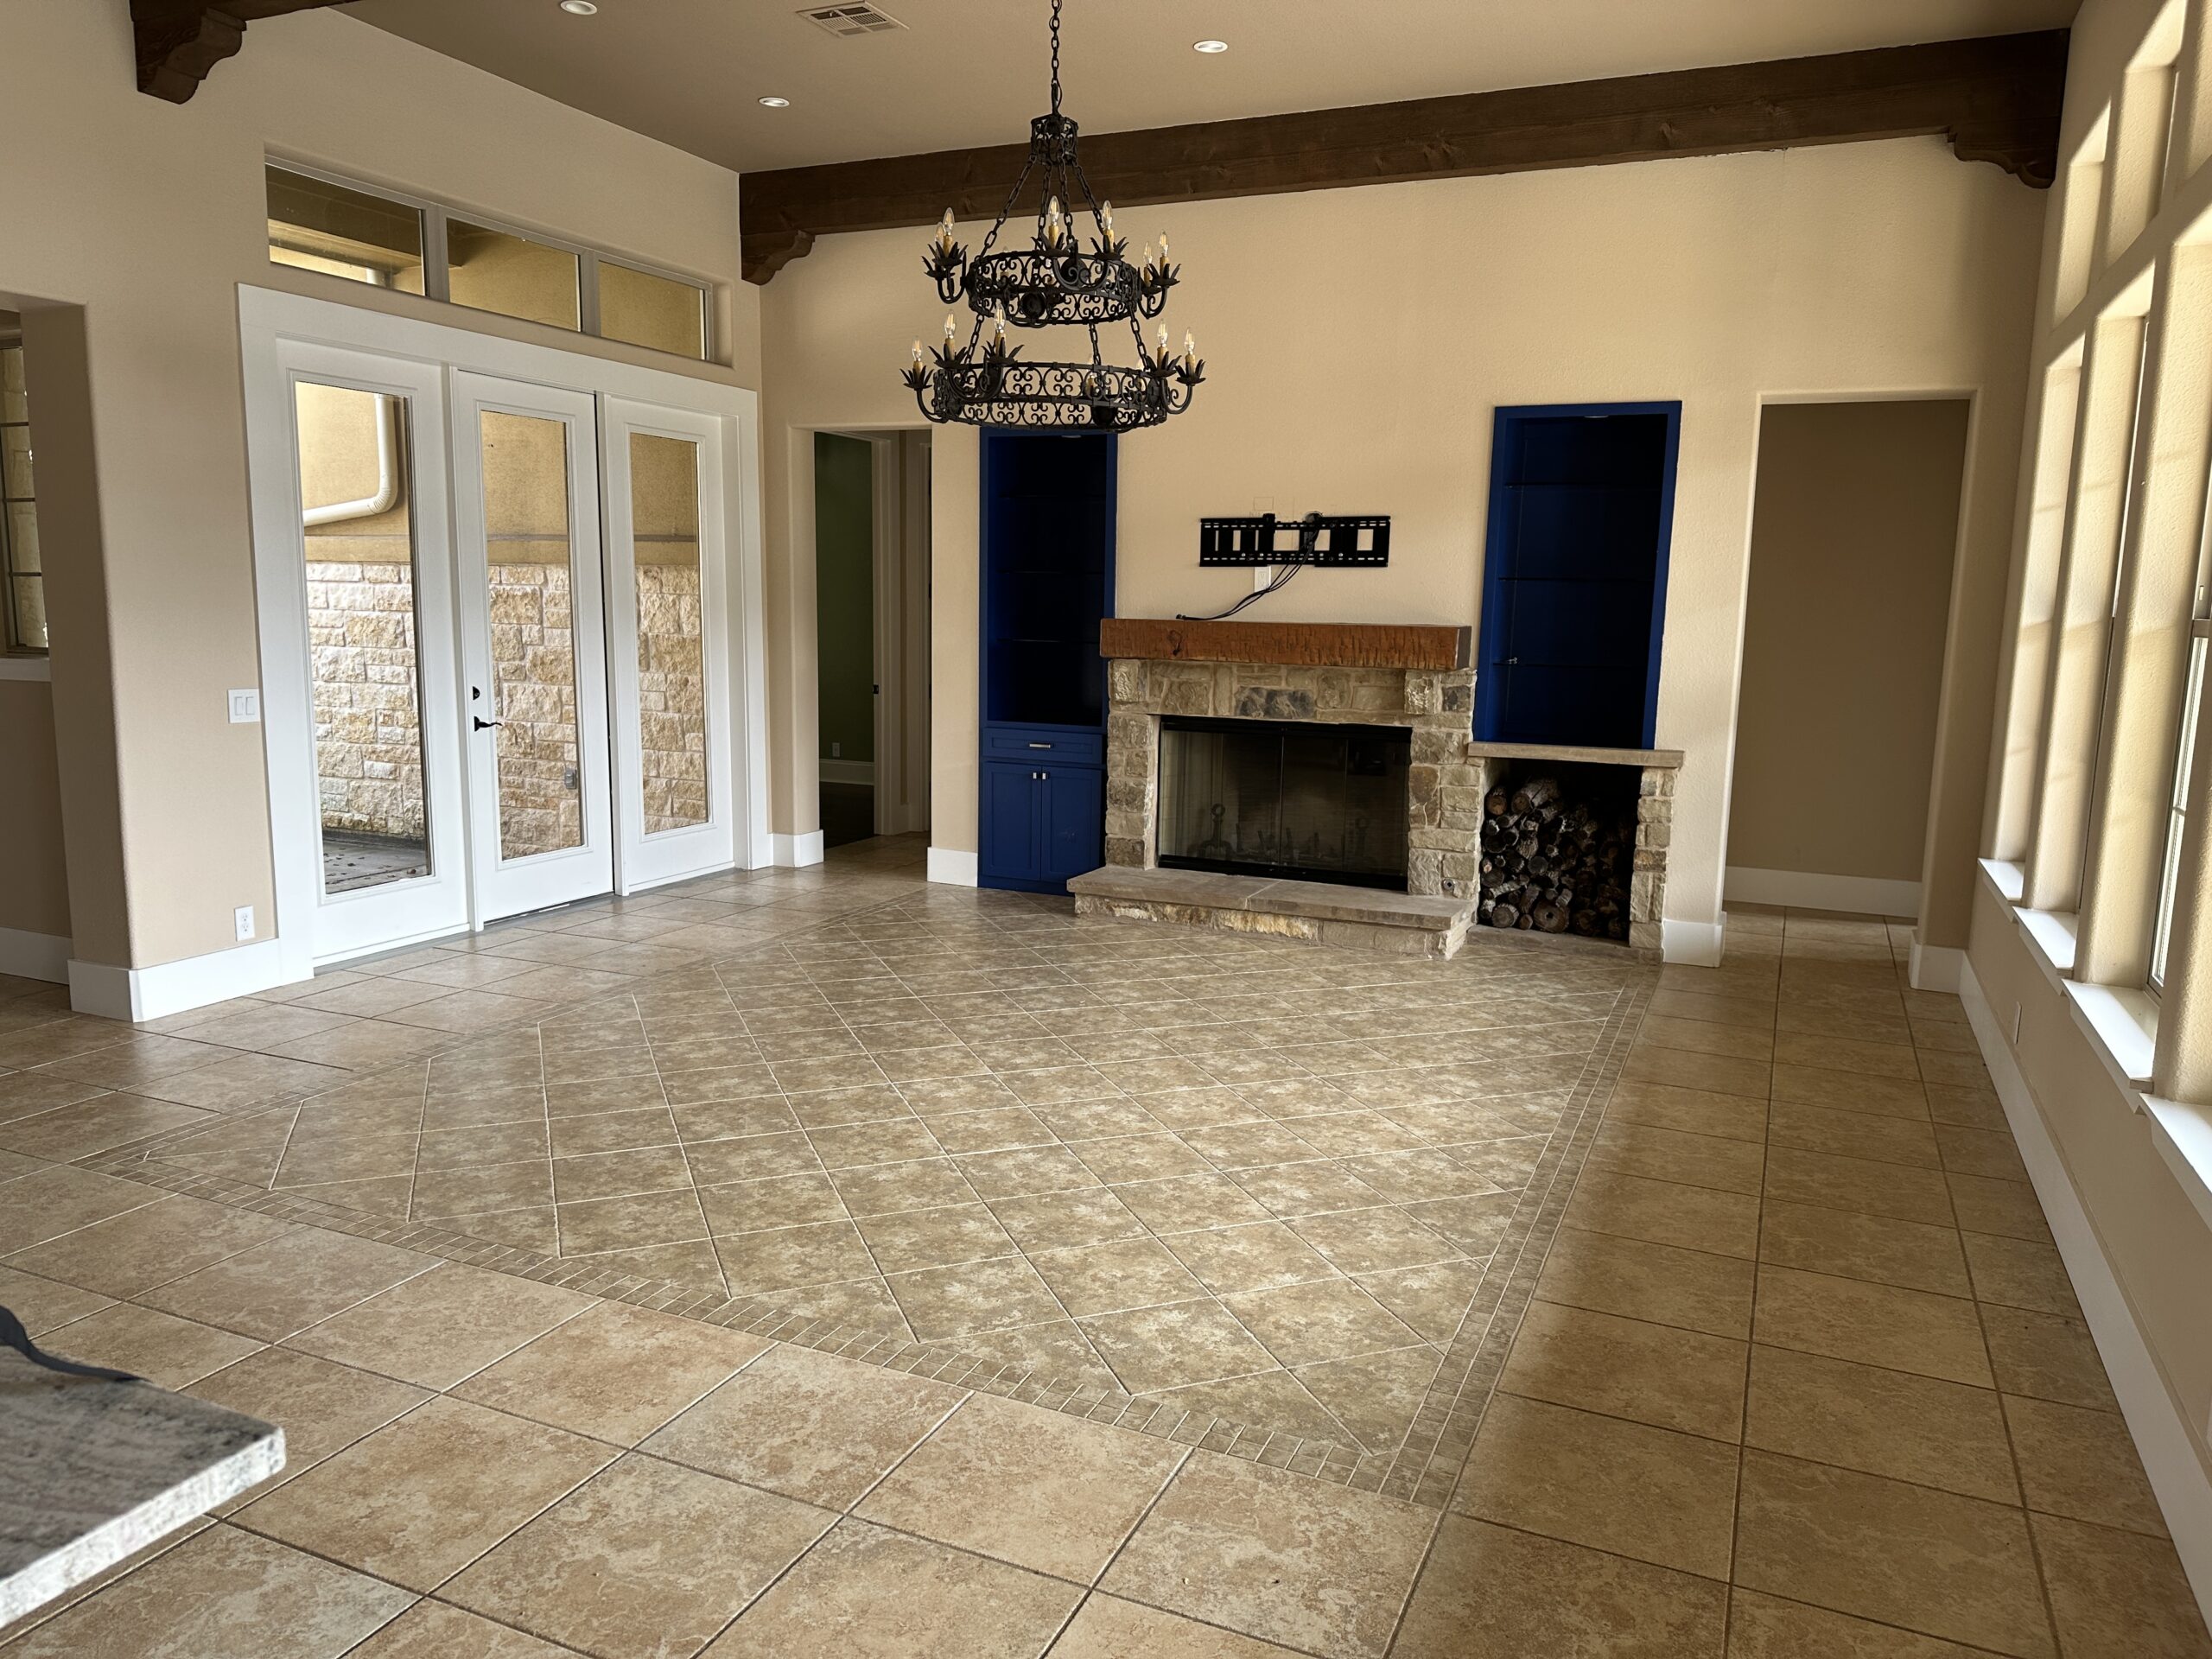
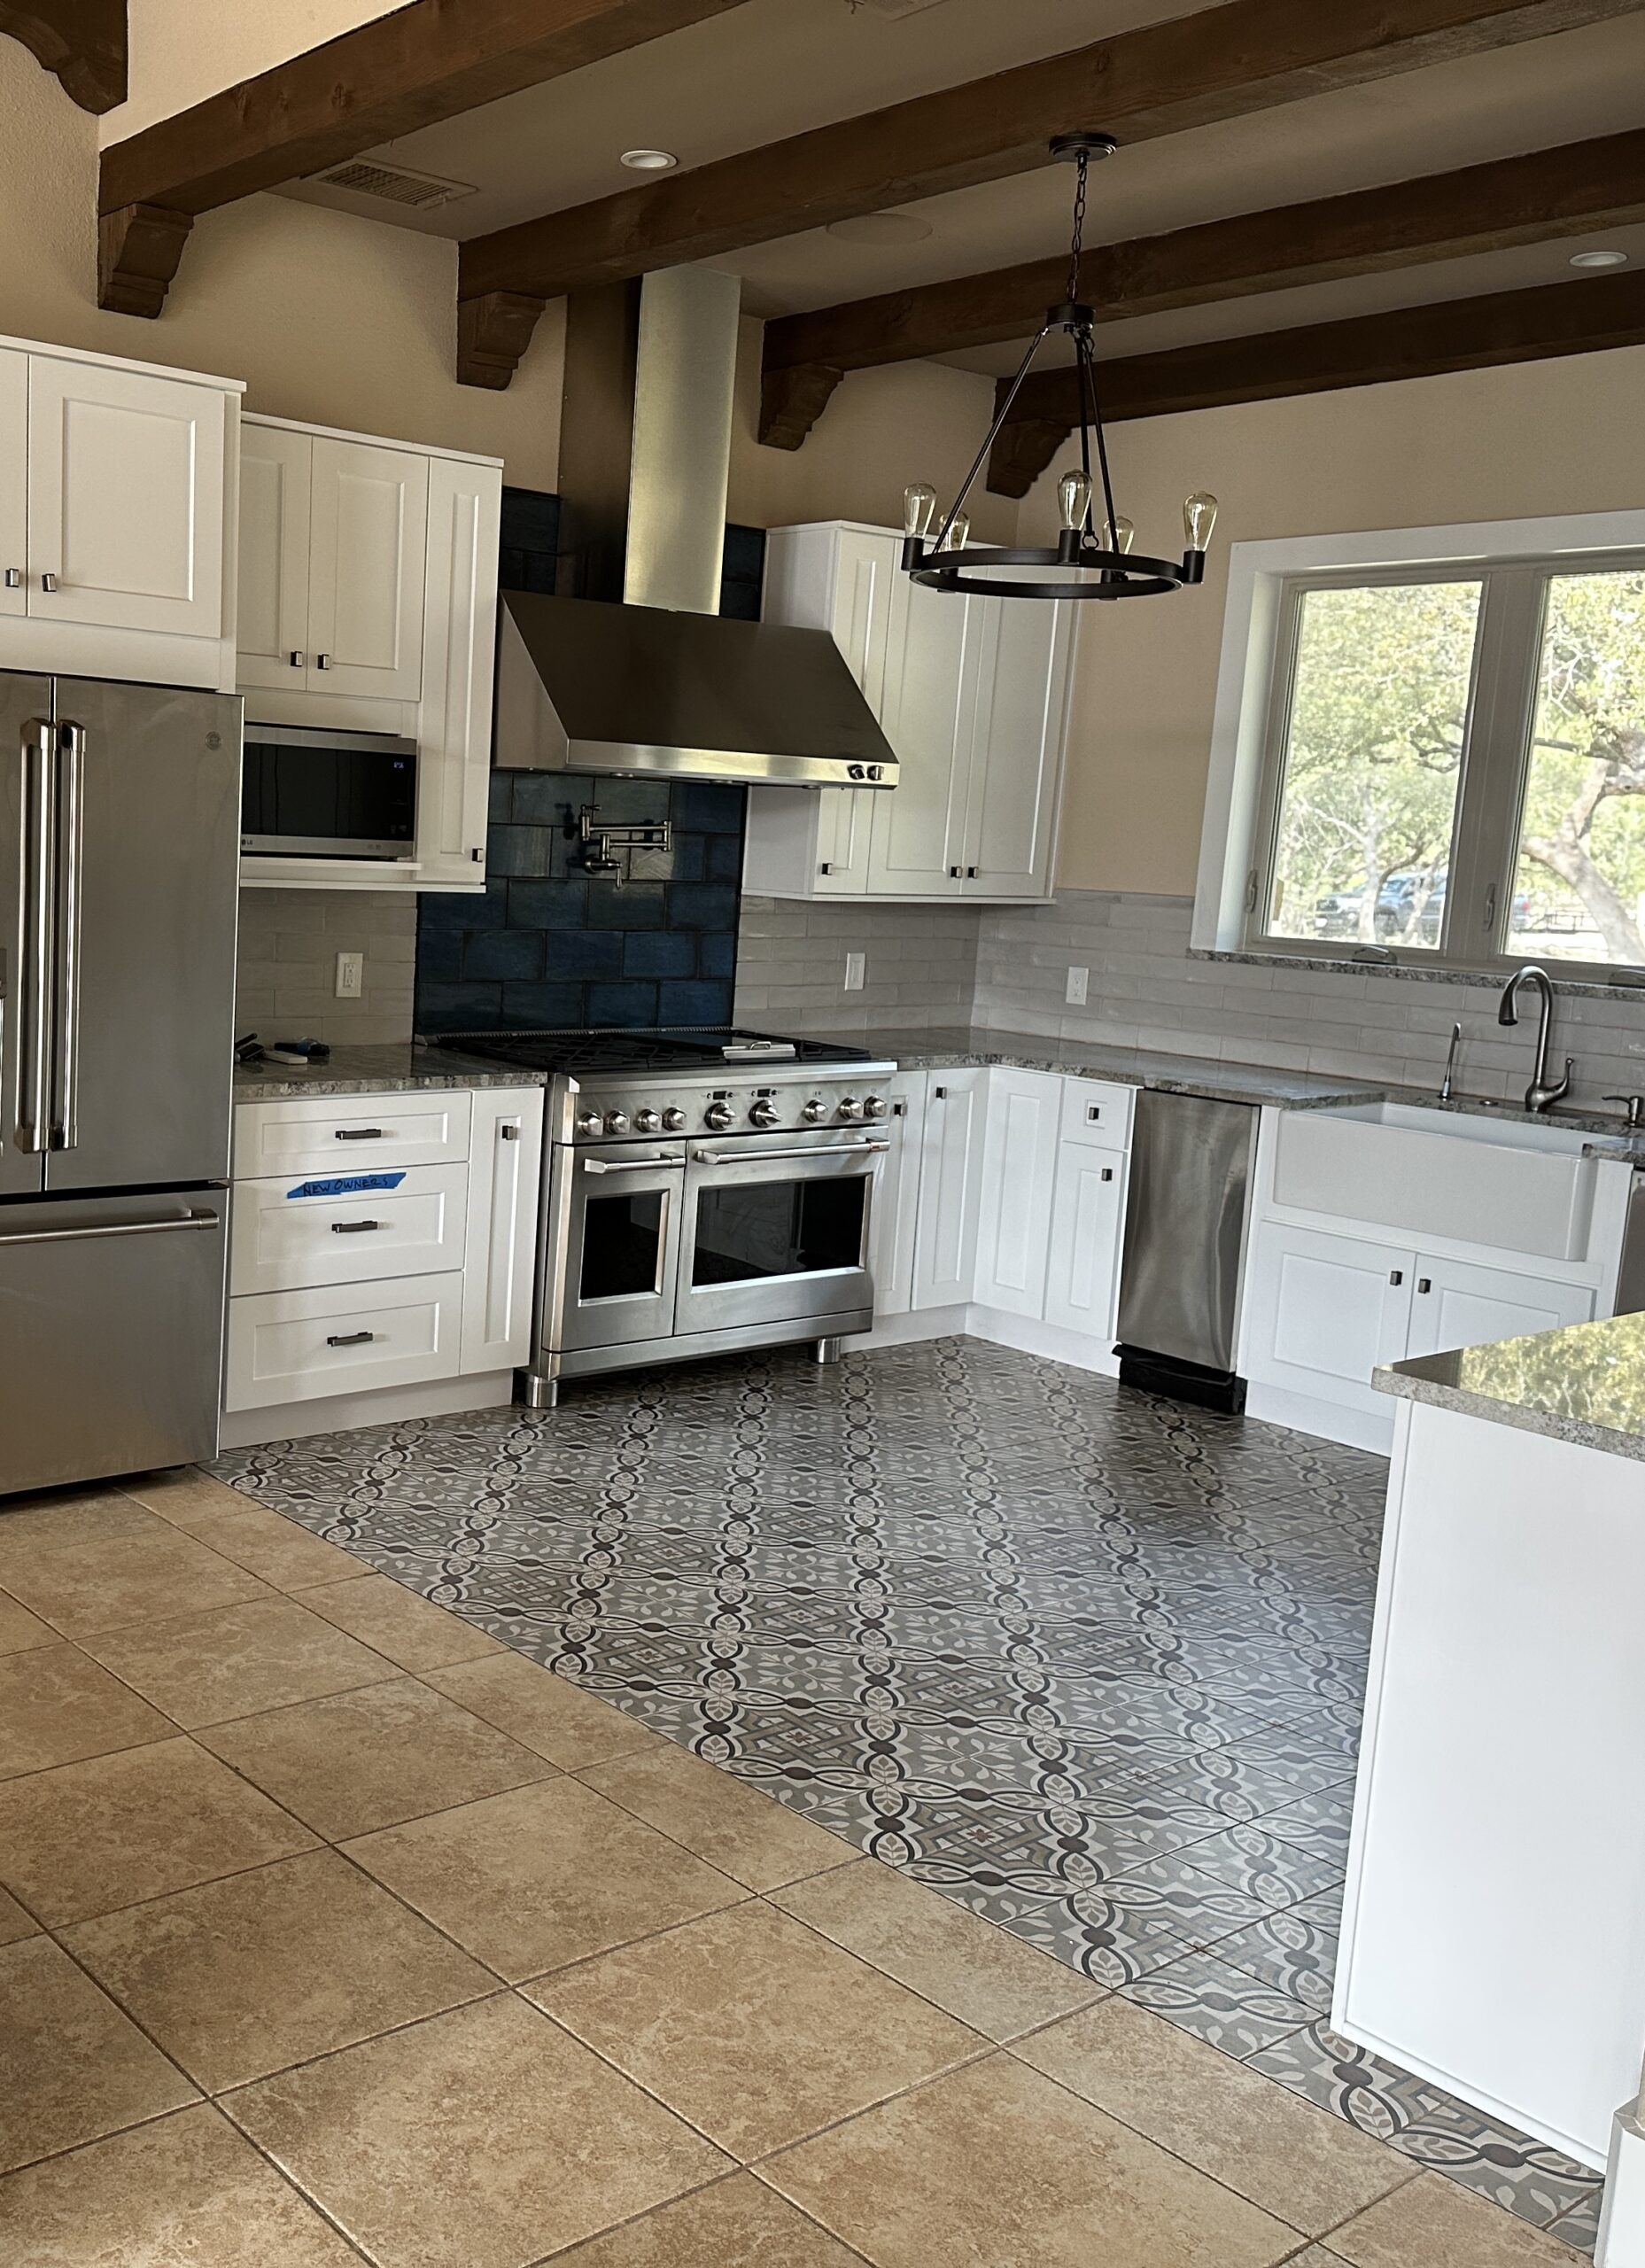
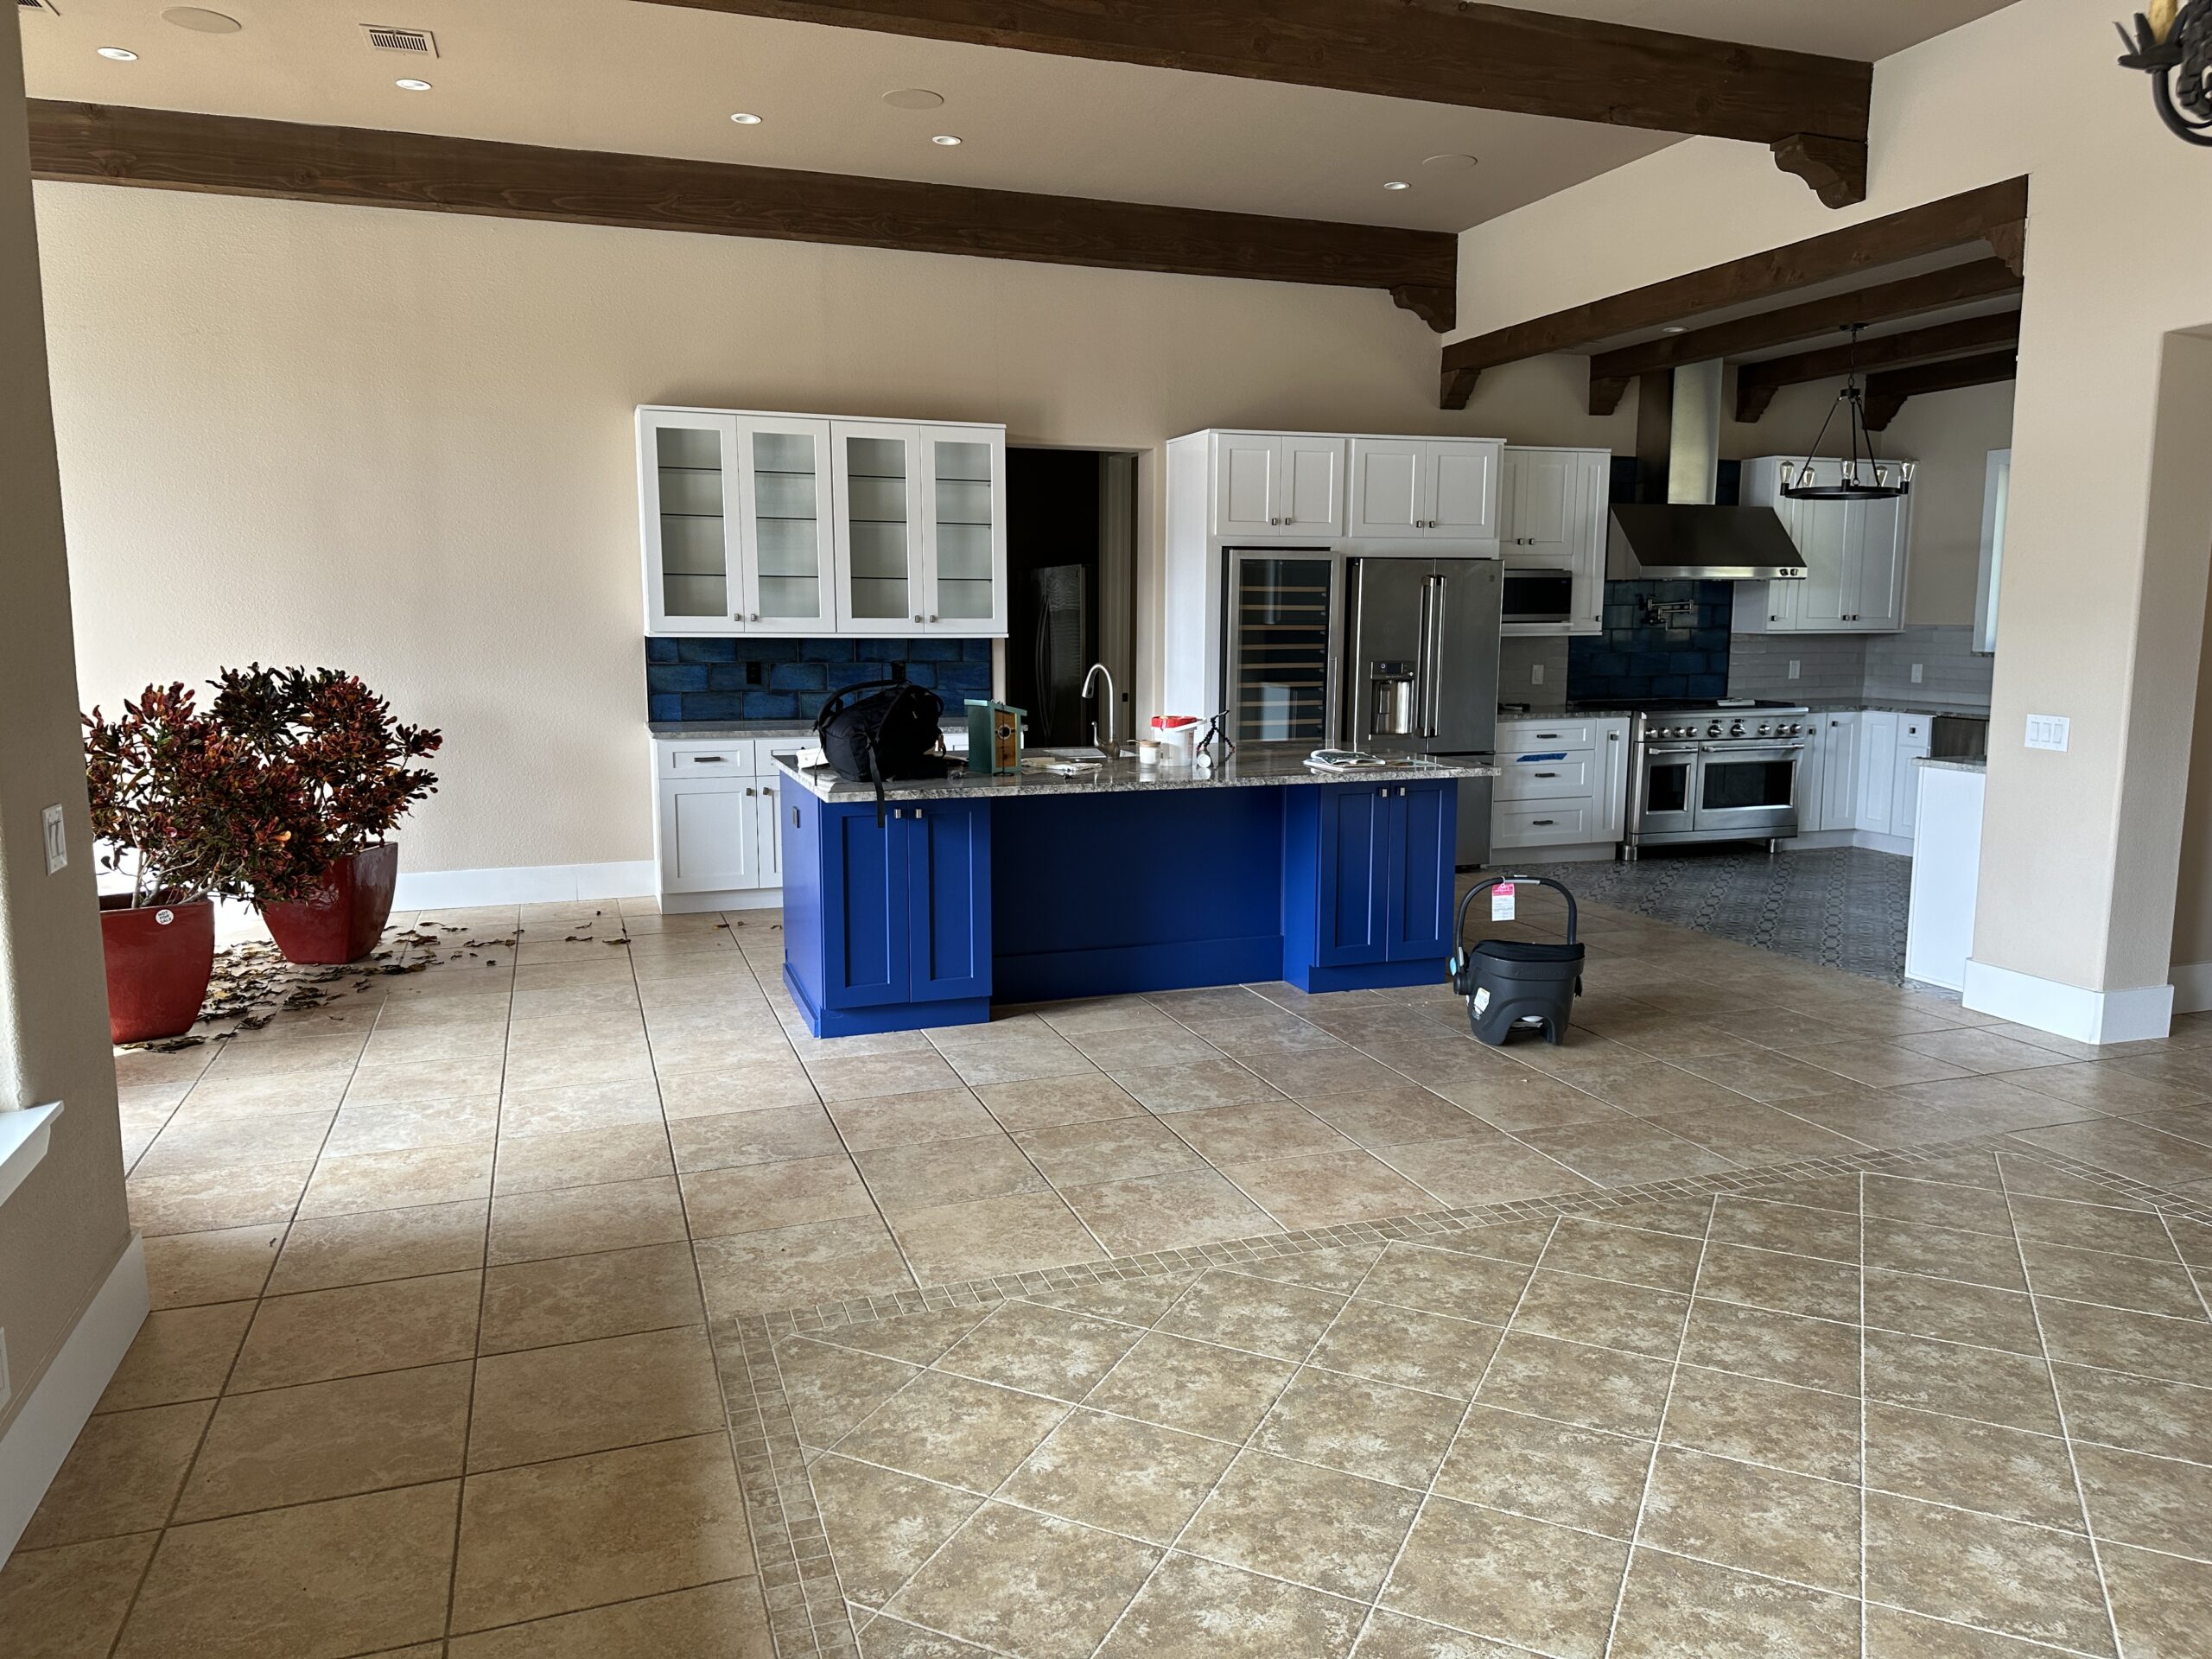
The moment I saw our home, I fell in love with its large windows, tall ceilings, and endless potential. Though it was built in 2014, the finishes felt dated and in need of a refresh. From the mustard yellow master bedroom to the royal blue front door and kitchen island, not to mention three floor tiles—it was clear that some updates were necessary.
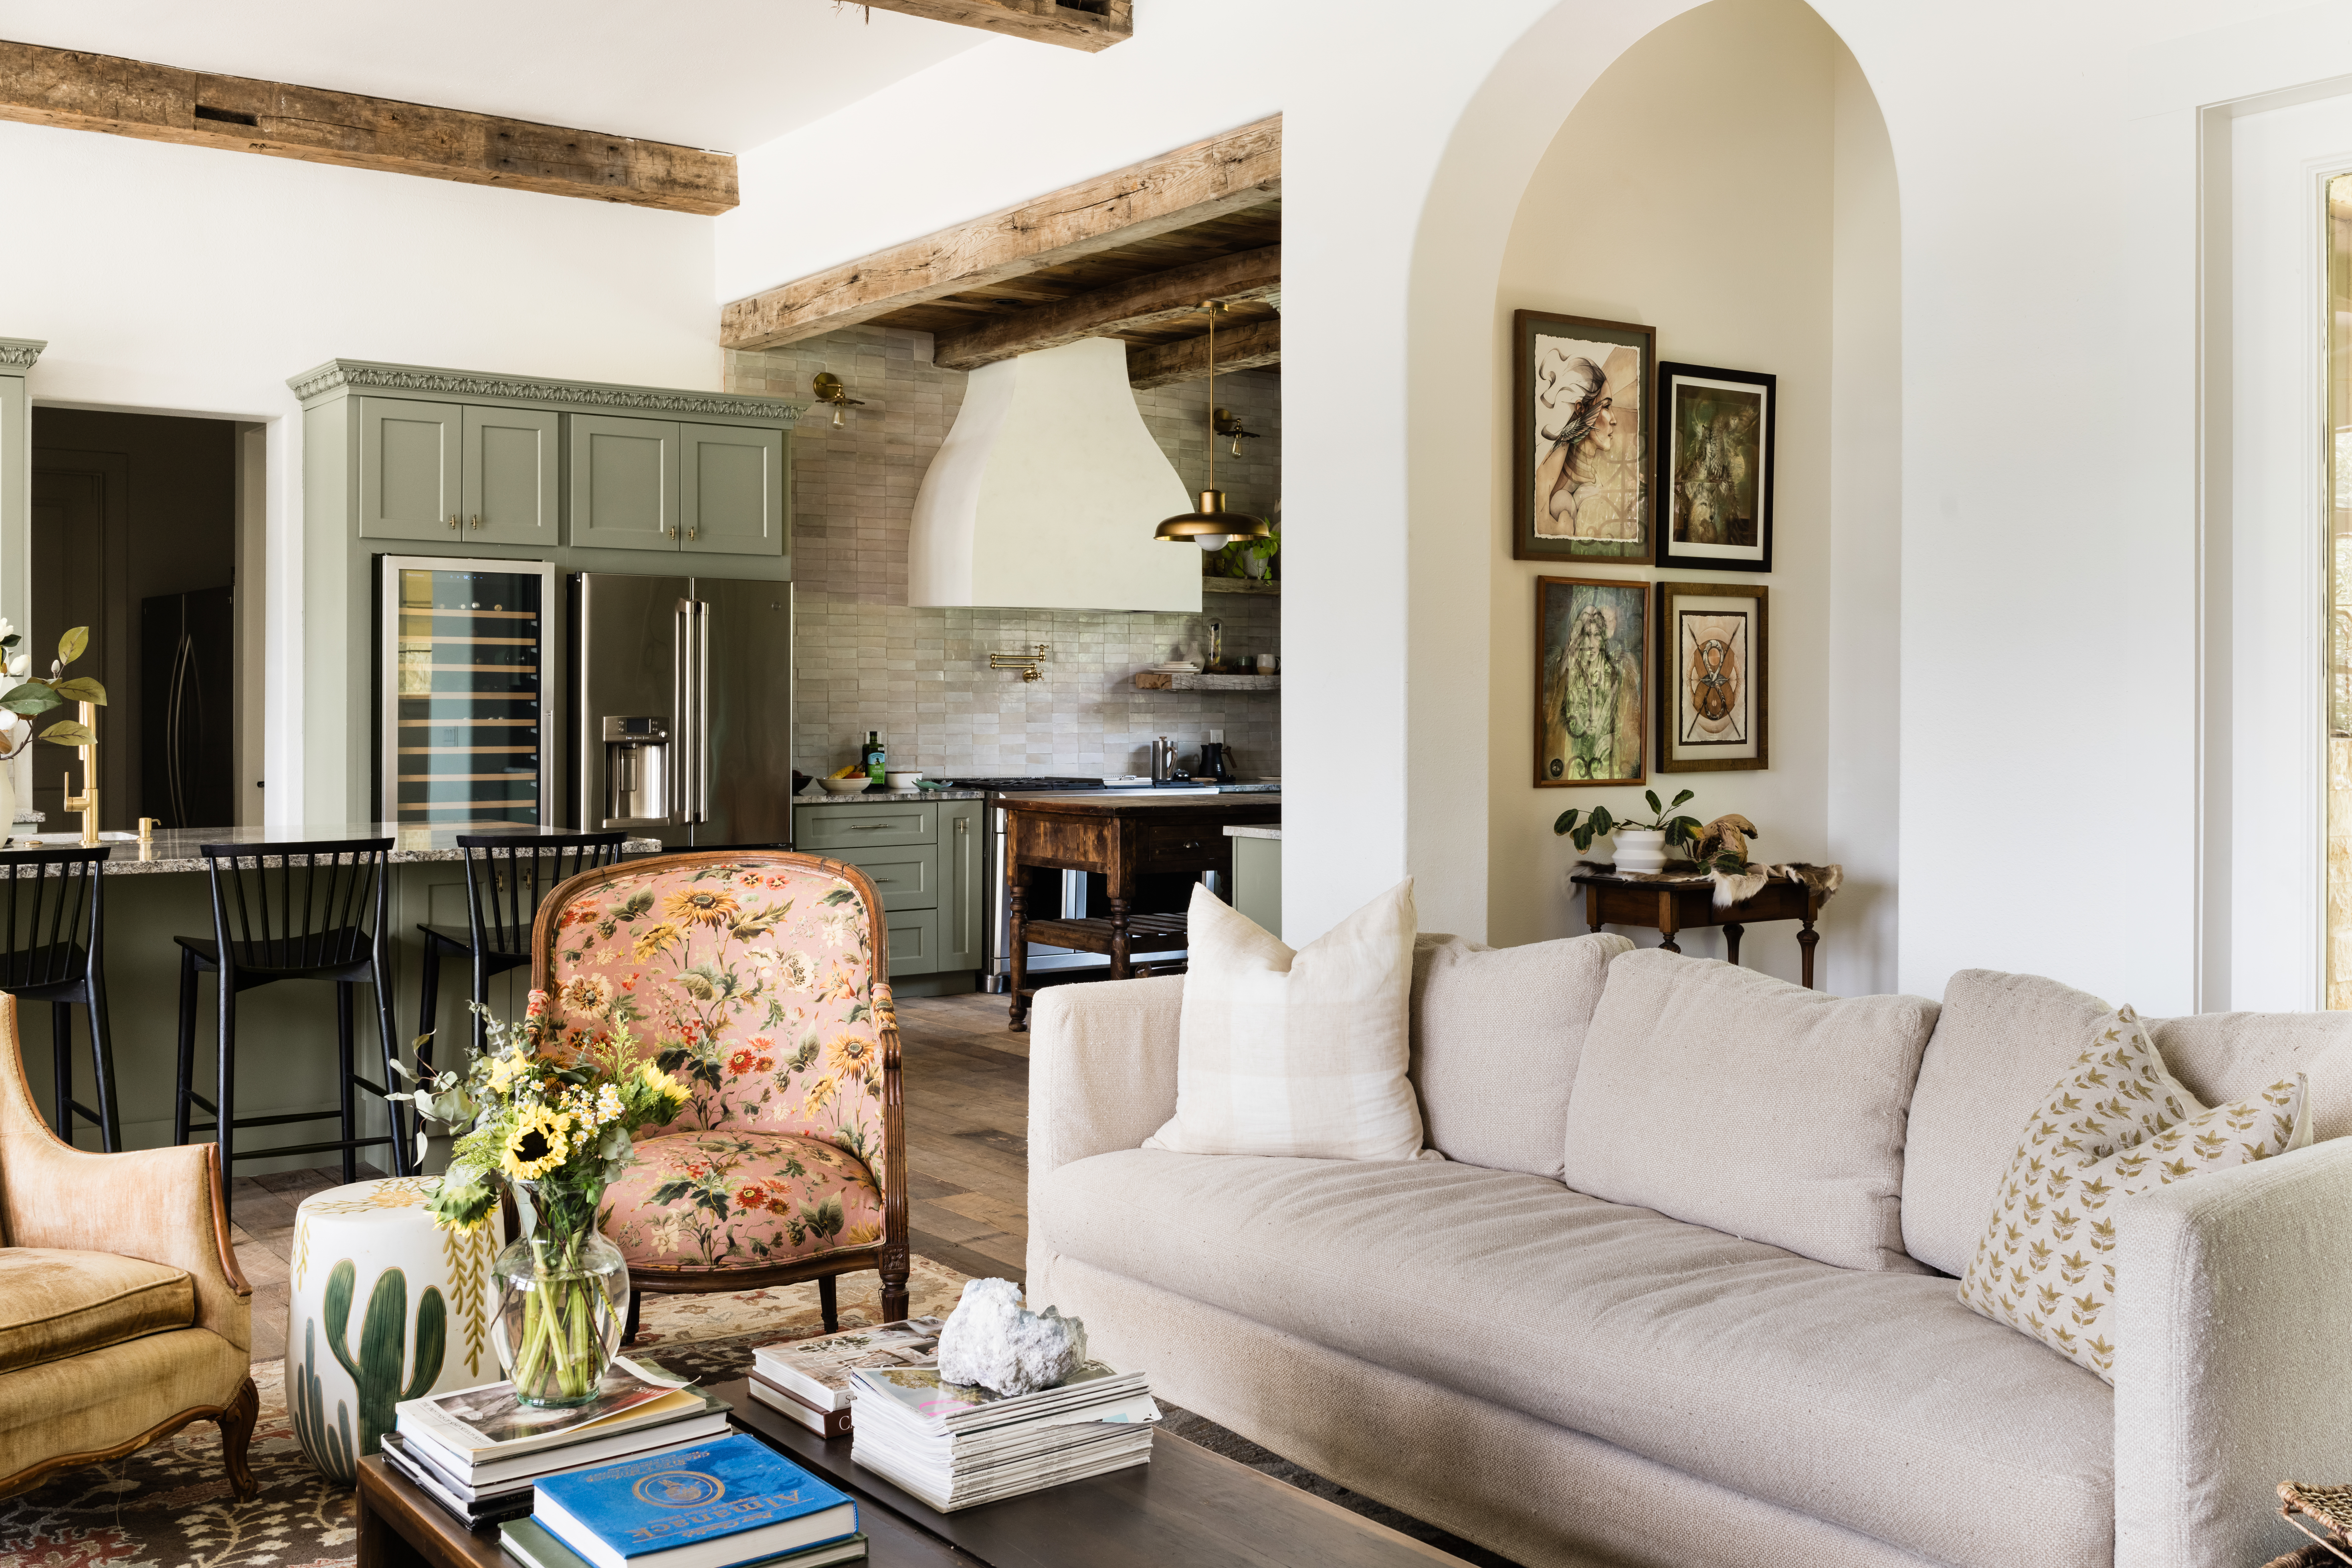
As you enter from the front door, you’re greeted by a formal living room, dining room, and kitchen. The 12-foot ceilings in most of the space were impressive, especially with large beams stretching across the room and a wall of windows showcasing our pool and oak trees. This communal area was where our renovation journey began, aiming to improve the quality of life in the room where our family spends most of our time.
Crafting the Vision
My husband Michael and I are passionate about art. Over the years, we’ve collected a wide variety of beautiful and unique pieces, each with its own story. One painting, in particular, stood out as my favorite—“Within Rhythm” by Hans Valor, my favorite artist. I even have a piece of the painting tattooed on my arm—my only tattoo.
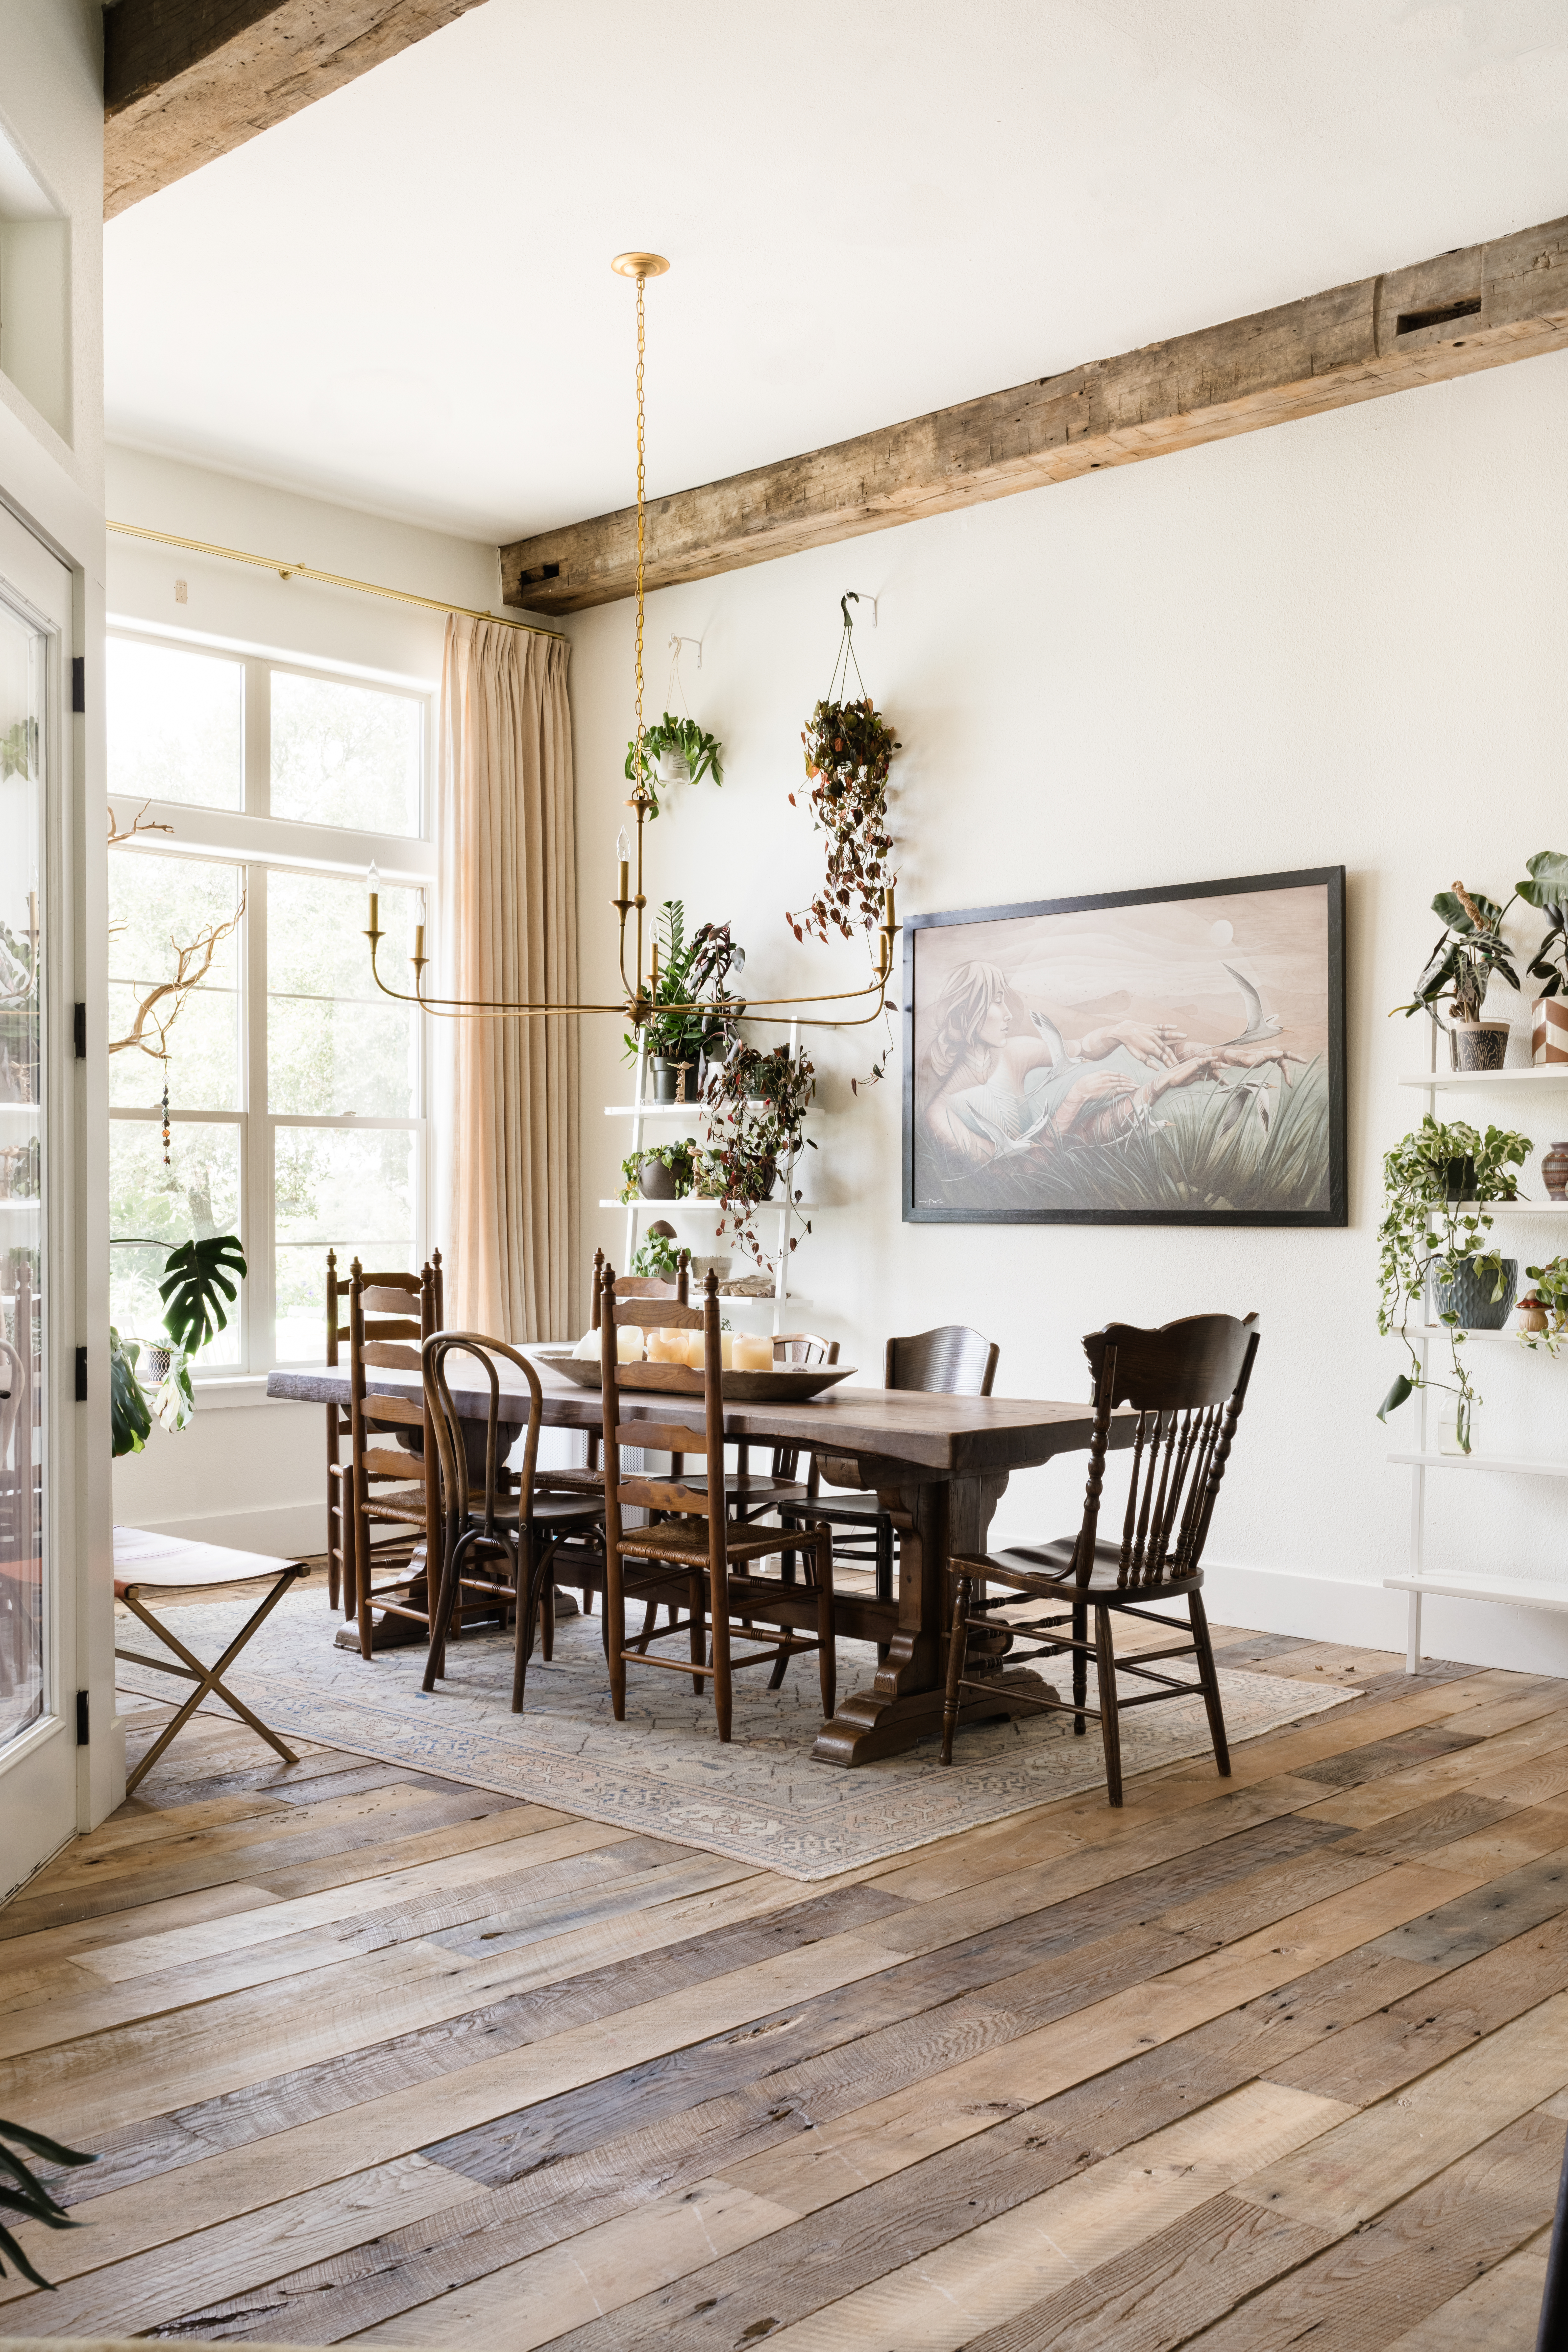
The painting features a woman dancing in tall grasses with a serene landscape behind her and birds soaring between the blades of grass. The earthy, peaceful colors evoke a sense of calm and connection with nature. This painting became the inspiration for our great room design. I imagined how this woman would decorate her space, what colors she would choose, and what materials she would use.

There were a few key elements I knew I wanted to change ASAP:
- The blue island and built-ins
- White kitchen cabinets
- Floors
- Beams
However, much of the room would remain the same, including the layout of the space and kitchen cabinetry.
Inspiration and Trends
I spent months living in the space and curating my online feed, following interior designers and creatives who sparked inspiration. Over time, I noticed several trends that resonated with me:
- Green kitchen cabinetry
- Reclaimed wood
- Zellige tile
- Crown molding
- Arches
- Plaster vent hood
- Lots of texture
With a clear vision in mind, the home renovation began!
Tackling the Work
Before this project, I had never used a power tool, let alone renovated an entire kitchen. I was committed to doing as much of the work myself as possible while ensuring high-quality results. Thankfully, I met Becky Sagen (@sagenworks), who became my DIY mentor. With her guidance and the help of some contractors (who begrudgingly let me assist), I started learning and transforming our home.
The Challenge of Renovation
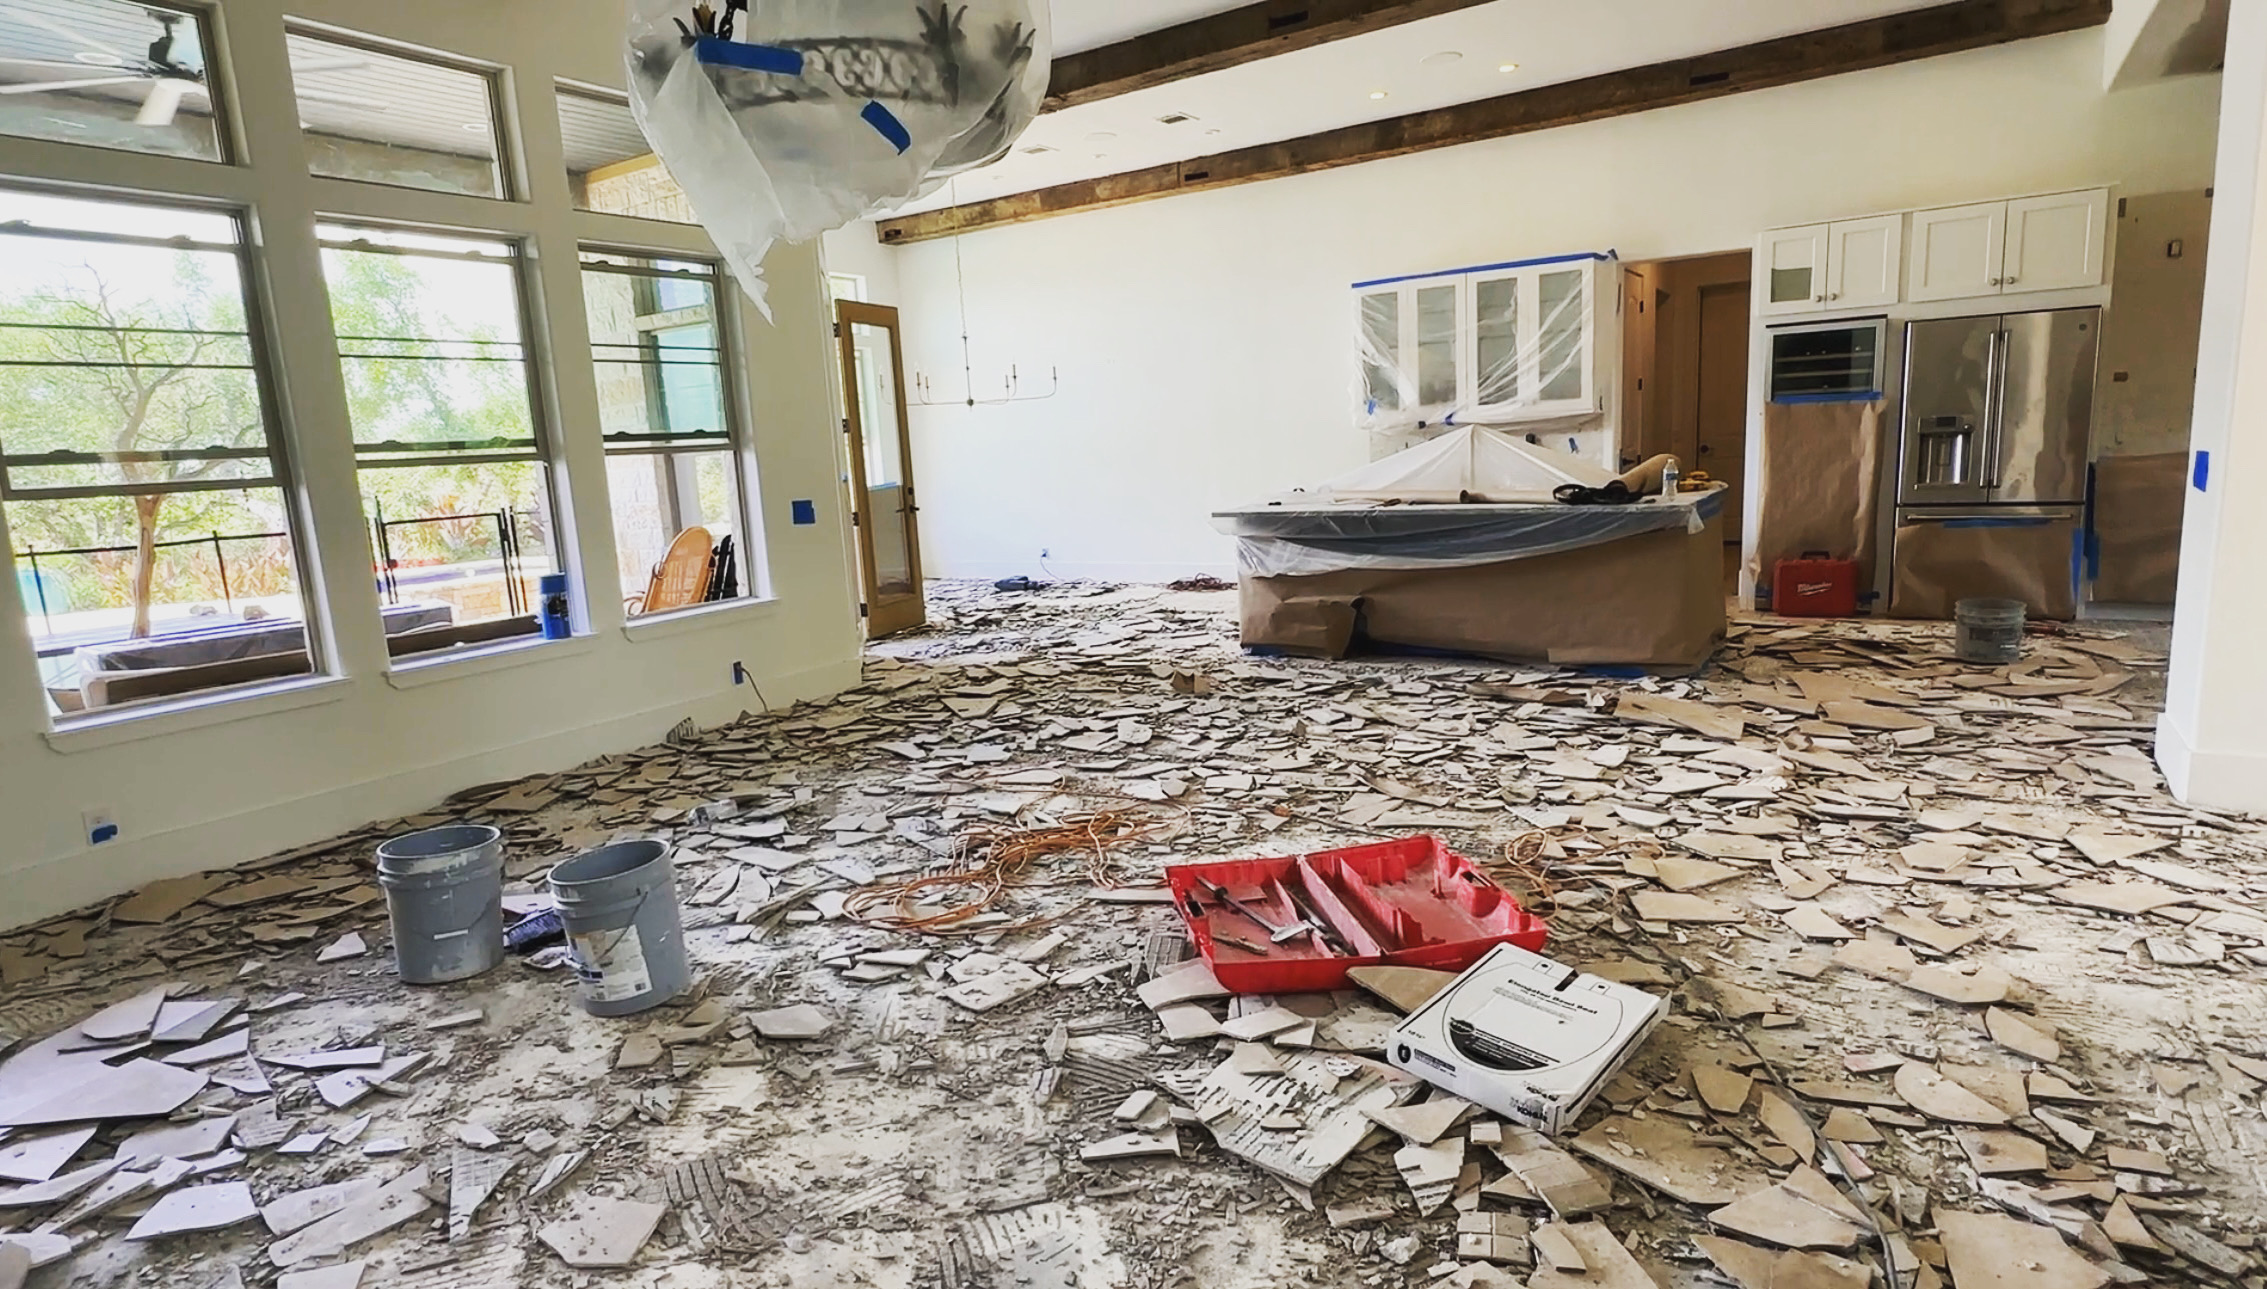
Since this room is where we spend 75%+ of our time, renovating it was going to be a challenge—especially since it meant losing access to our kitchen. To minimize disruption, Michael took our kids to the beach for seven days, giving me the time to tackle the biggest tasks: floors, beams, and kitchen tile. These were the most disruptive changes and needed to be completed while the house was empty.
Demolition was exhausting—far less fun than I had imagined—but once it was done, I was all in, installing new beams (one weighed 1,000 lbs!), reclaimed wood floors, countertop-to-ceiling tile, and a new arched entry. I started working before the crew arrived and stayed working long after they left, determined to get the job done.
Dining Room: Where Art and Nature Meet
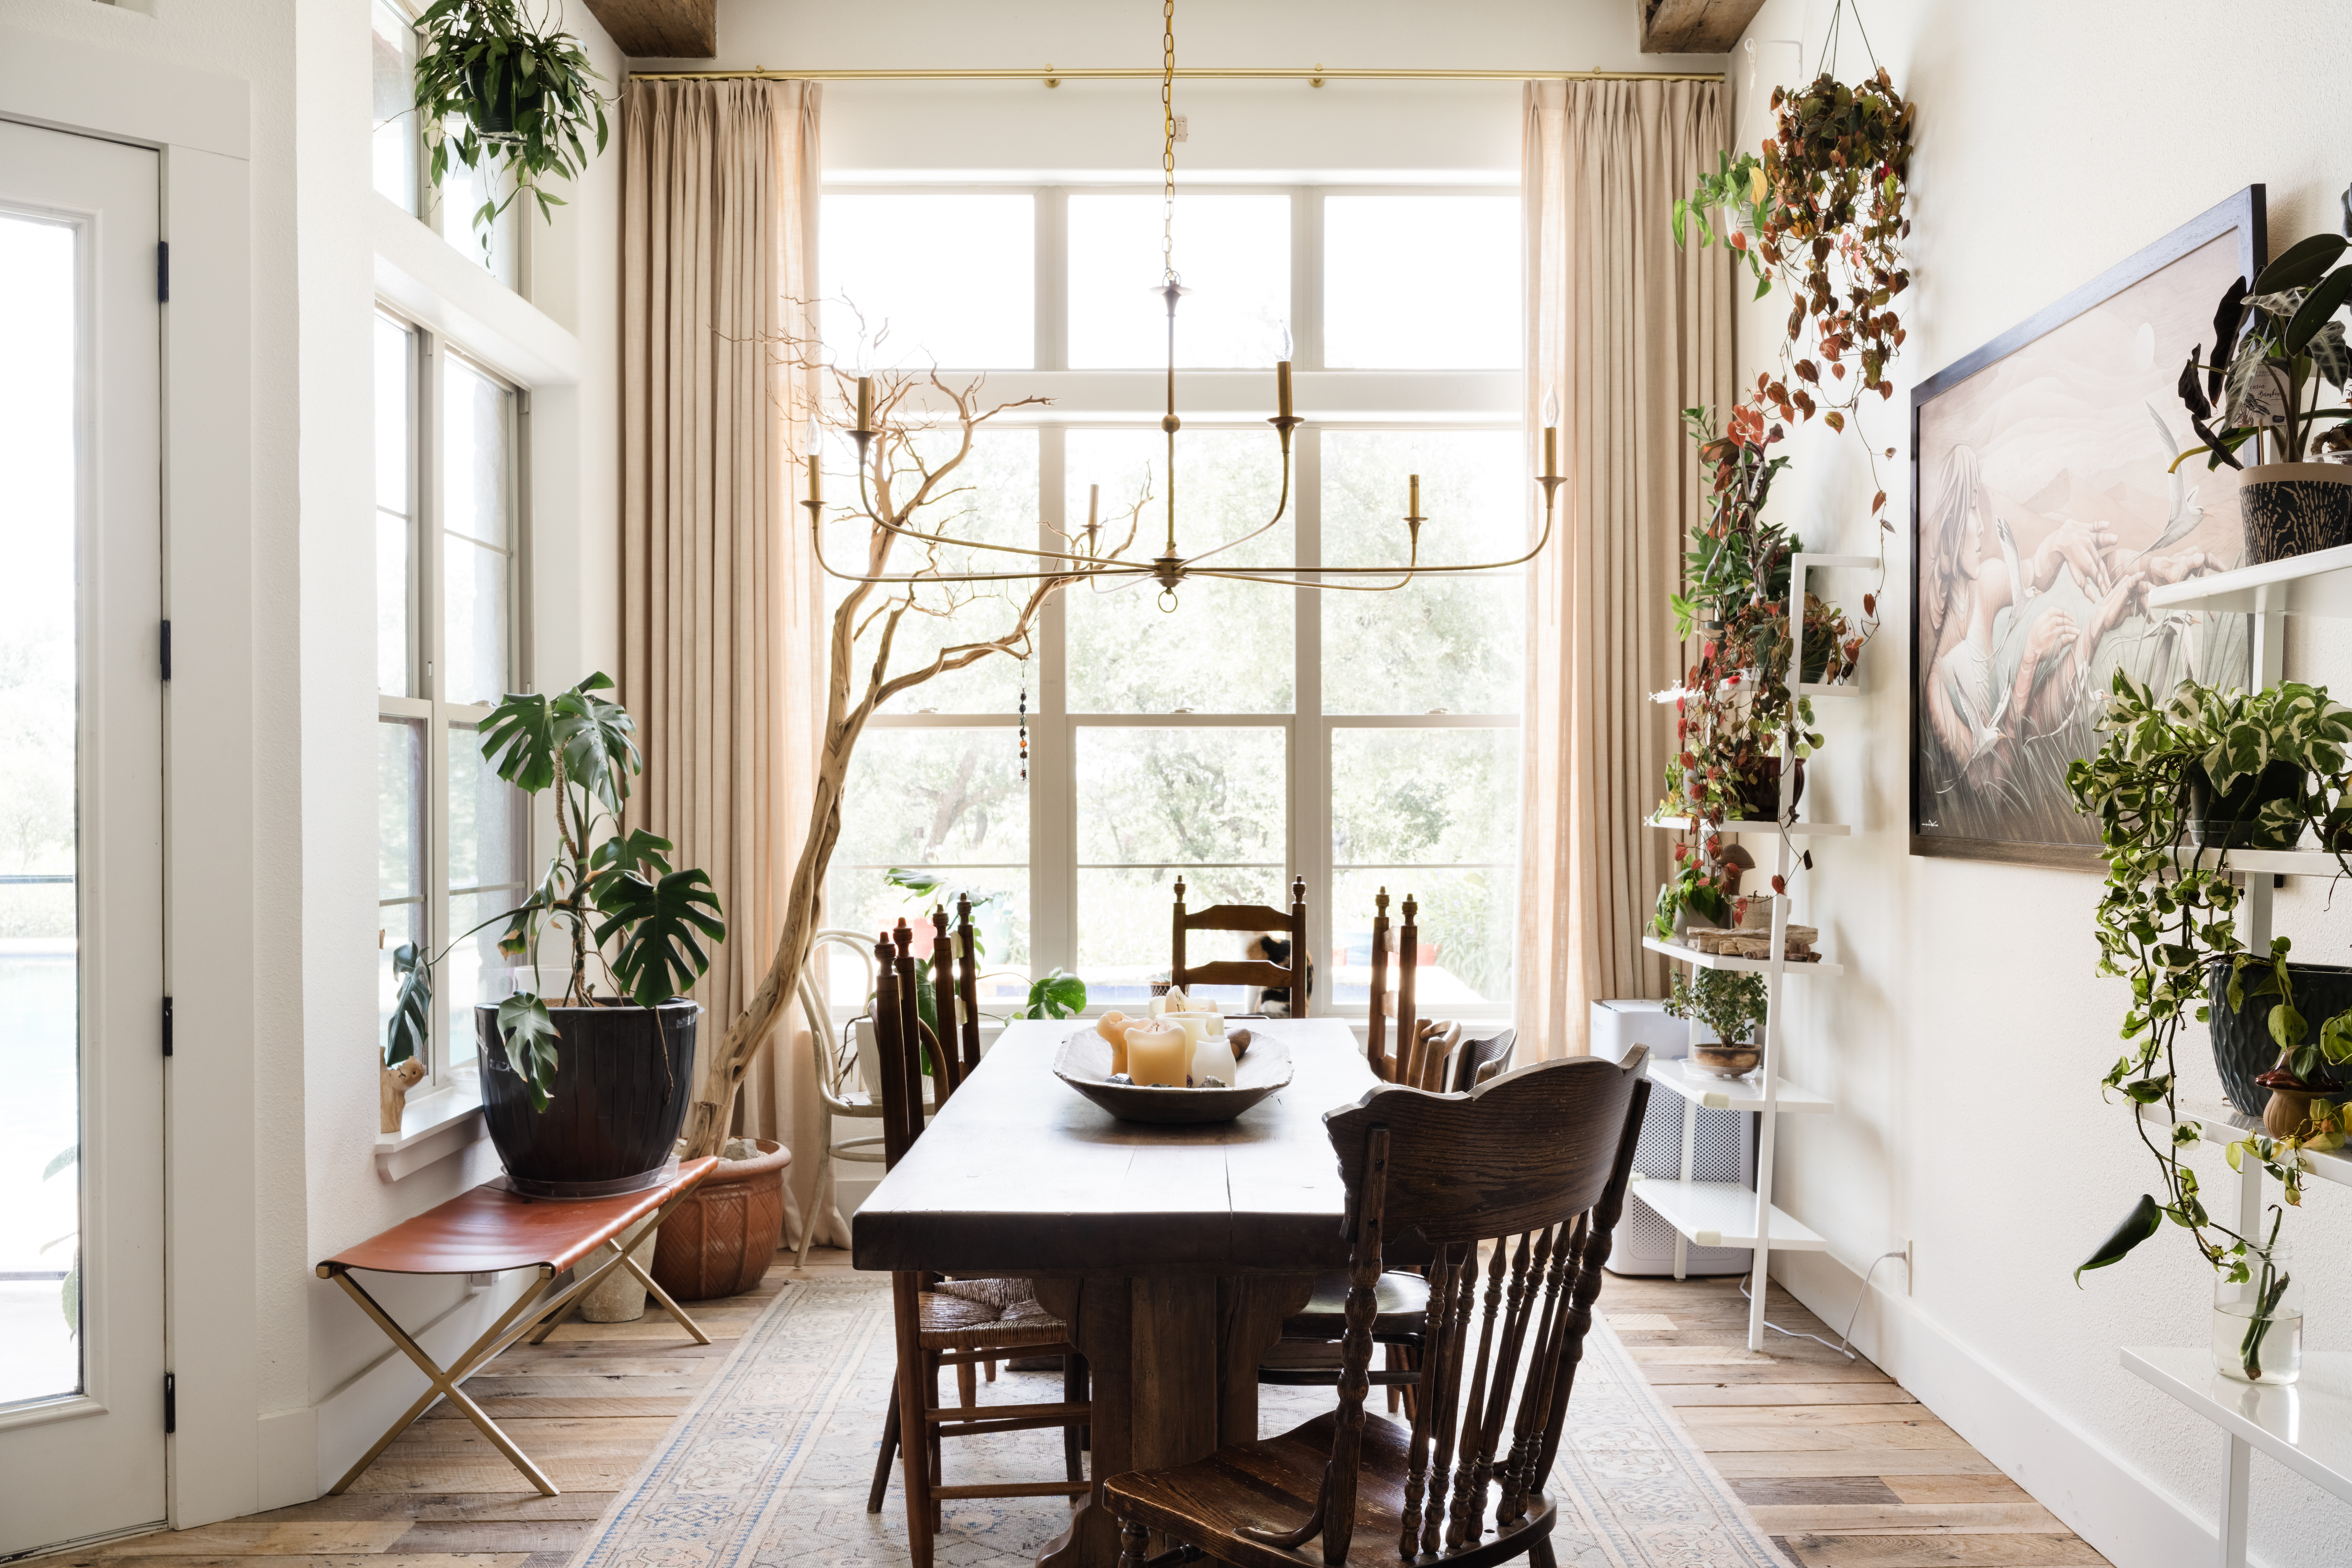
The dining room, where the inspiration painting lives, receives the most natural light. It felt fitting for our plants to congregate here, creating a jungle-like atmosphere. Two shelves from our previous home flank the painting, filled with plants and additional pots hanging near the ceiling. Eventually, I would love to build some arched bookcases to replace the white shelves – but that is for another day.
With small children, it was important that our dining room felt lived-in rather than pristine. Our table, a vintage find, was already distressed, so any new bumps or scratches would only add to its charm. The chairs were collected from Facebook Marketplace for $10-$50 each, adding to the room’s organic, eclectic, yet intentional feel.
I replaced the previous chandelier—a deer antler design—with a gold chandelier reminiscent of Beauty and the Beast, balancing elegance and grandeur.
My favorite addition was the floor-to-ceiling linen curtains in a sand color, paired with a brass curtain rod. These curtains add the perfect amount of texture and light filtration, elevating the entire dining room
Entryway: The Bold Arch
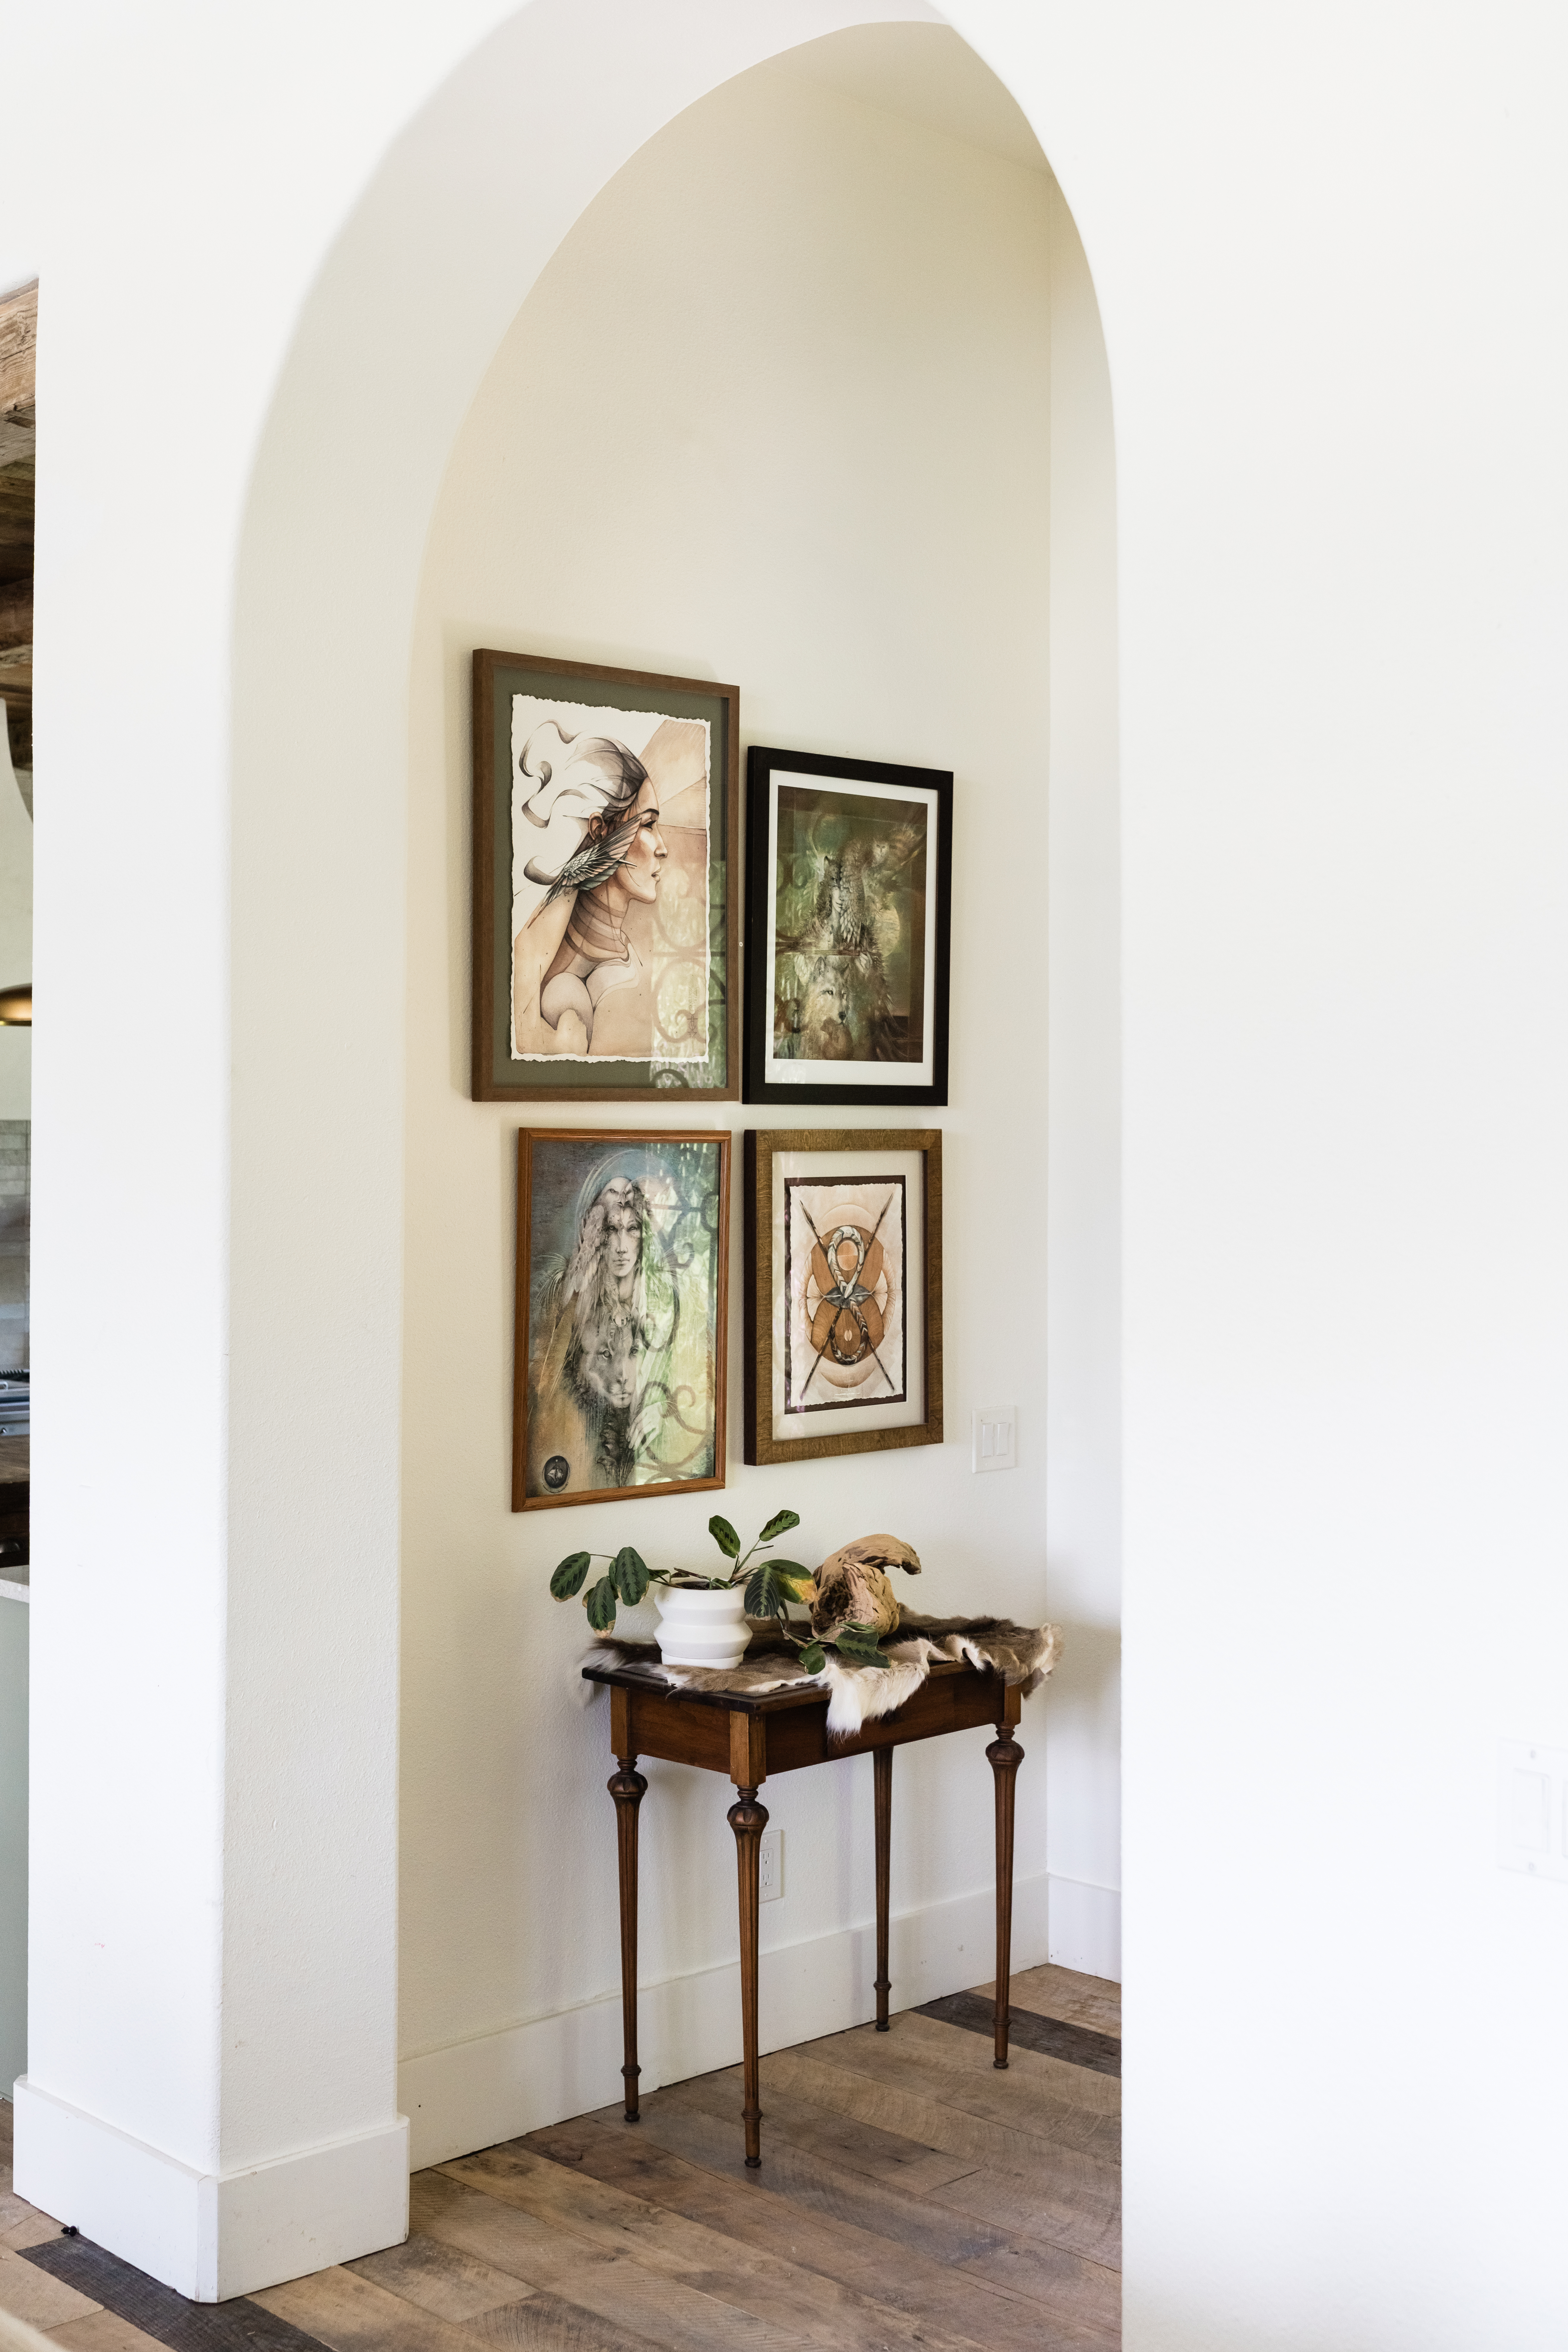
What about that arch though?! For a long time, I debated where to incorporate an arch—maybe in the doorways on either side of the fireplace or the entry to the hallway. It wasn’t until Emilie Crockett from Texas Reclaimed Wood suggested raising and arching the main entry that I realized this would be the perfect spot.
The arch adds character and interest, making the room feel grander while highlighting the art in the entryway.
Formal Living Room: A Nod to the Past
Nearly all the furniture and decor in the living room came with us from our previous home. I kept the original wrought iron chandelier because its details reminded me of New Orleans, where my husband is from. The painting above the mantle, an abstract rooster by my grandmother, is another cherished piece.
The main changes were the built-ins and an antique chair I reupholstered. I covered the bright blue paint on either side of the fireplace with a subtle Urban Putty by Sherwin Williams. Eventually, I’ll paint all the baseboards, trim, and interior doors in this color as well.
The chair, a 100-year-old French antique, is now a functional art piece after being reupholstered in fabric from House of Hackney. My hope is that it stays in our family for generations.
Kitchen and Nook: The Heart of the Home
It’s hard to grasp the layout from photos, but in person, this setup is near perfect. With a large main island at its center and an adjacent nook for cooking, the kitchen is ideal for entertaining adults and feeding our children. We spend countless hours gathered around these islands.
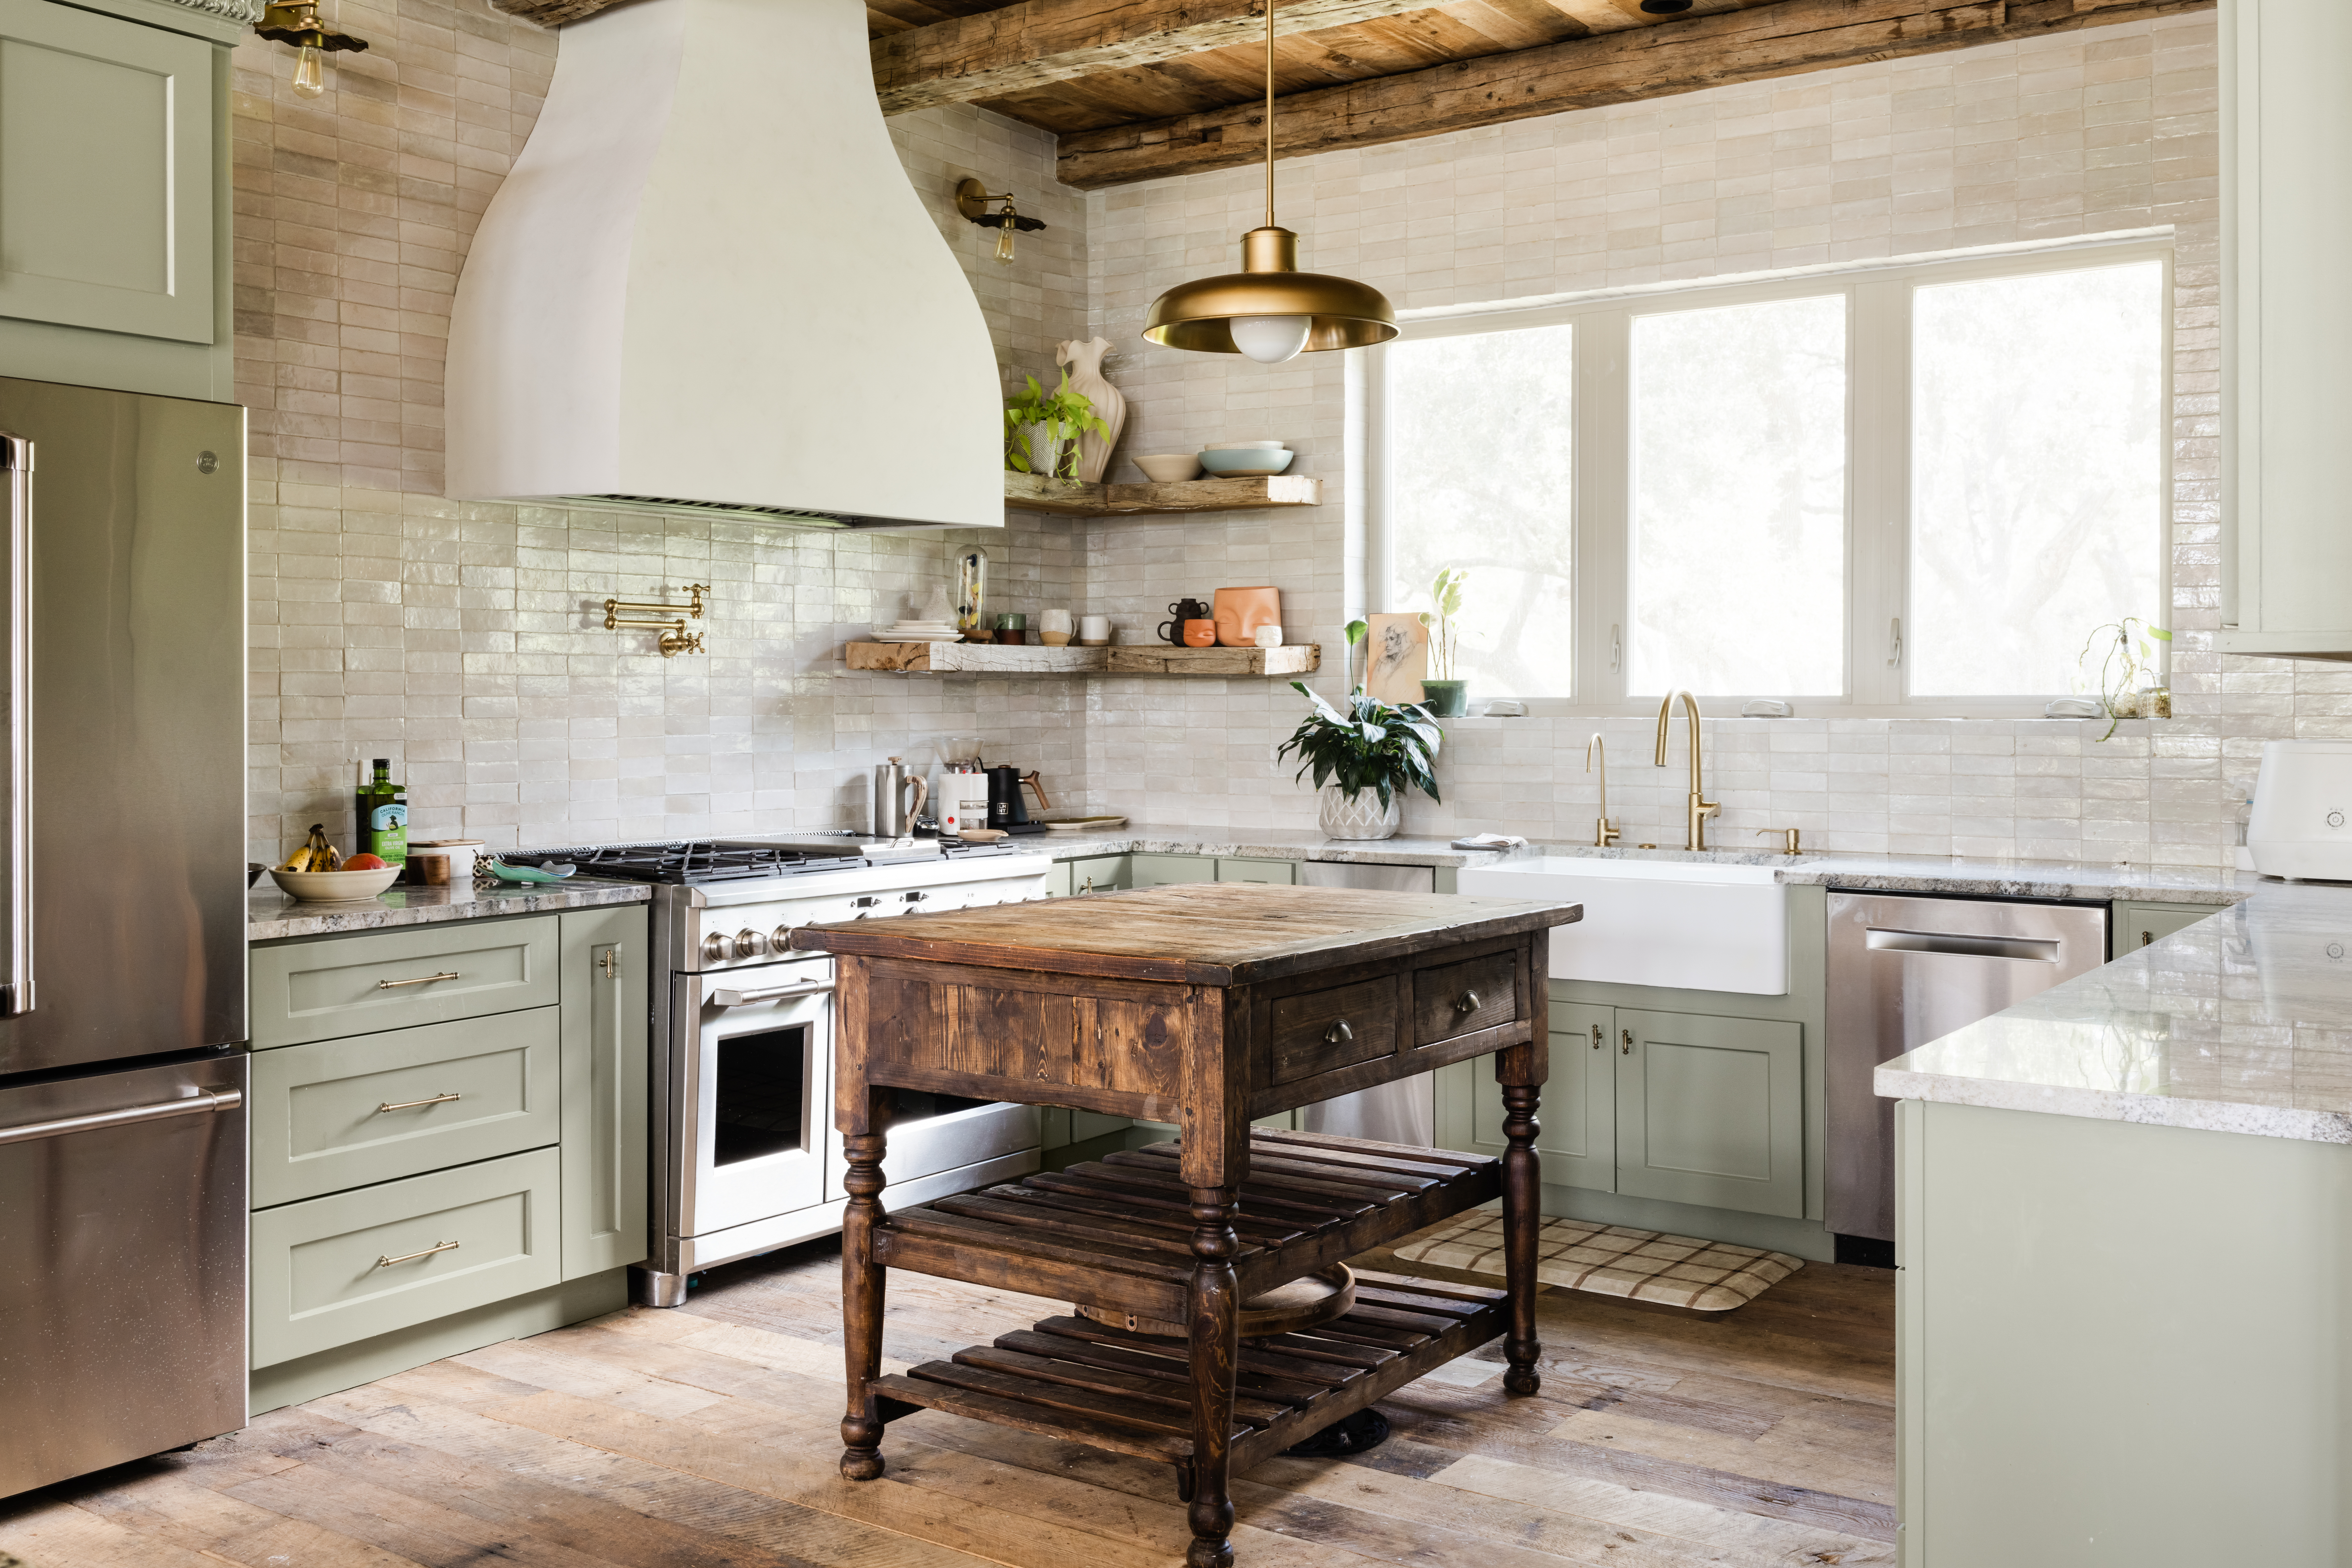
When reimagining the kitchen nook, I wanted to accentuate the lowered ceiling and create a warm, inviting atmosphere. Inspired by Amber Lewis, I chose reclaimed beams with matching wood cladding to give the space an aged, character-filled look. The nook has become my favorite place in the entire house.

Amber Lewis Inspiration
One of my proudest projects in this space is the vent hood. Also inspired by Amber Lewis, the bell-shaped Roman clay-covered hood is the star of our kitchen nook. I removed the cabinets on either side of the previous vent hood, replacing one with L-shaped floating shelves made from reclaimed wood. The curved shape of the hood adds femininity and softness, and the two-tone Roman clay finish provides the perfect texture.
Now, let me tell you about the green kitchen cabinets—this was a bit of a saga. Initially, I chose Saybrook Sage by Benjamin Moore, but the end result felt off—too minty, perhaps? It kept me up at night, so I repainted the entire island with Treron by Farrow and Ball, a darker, more earthy green. It was a pain, but I have zero regrets!
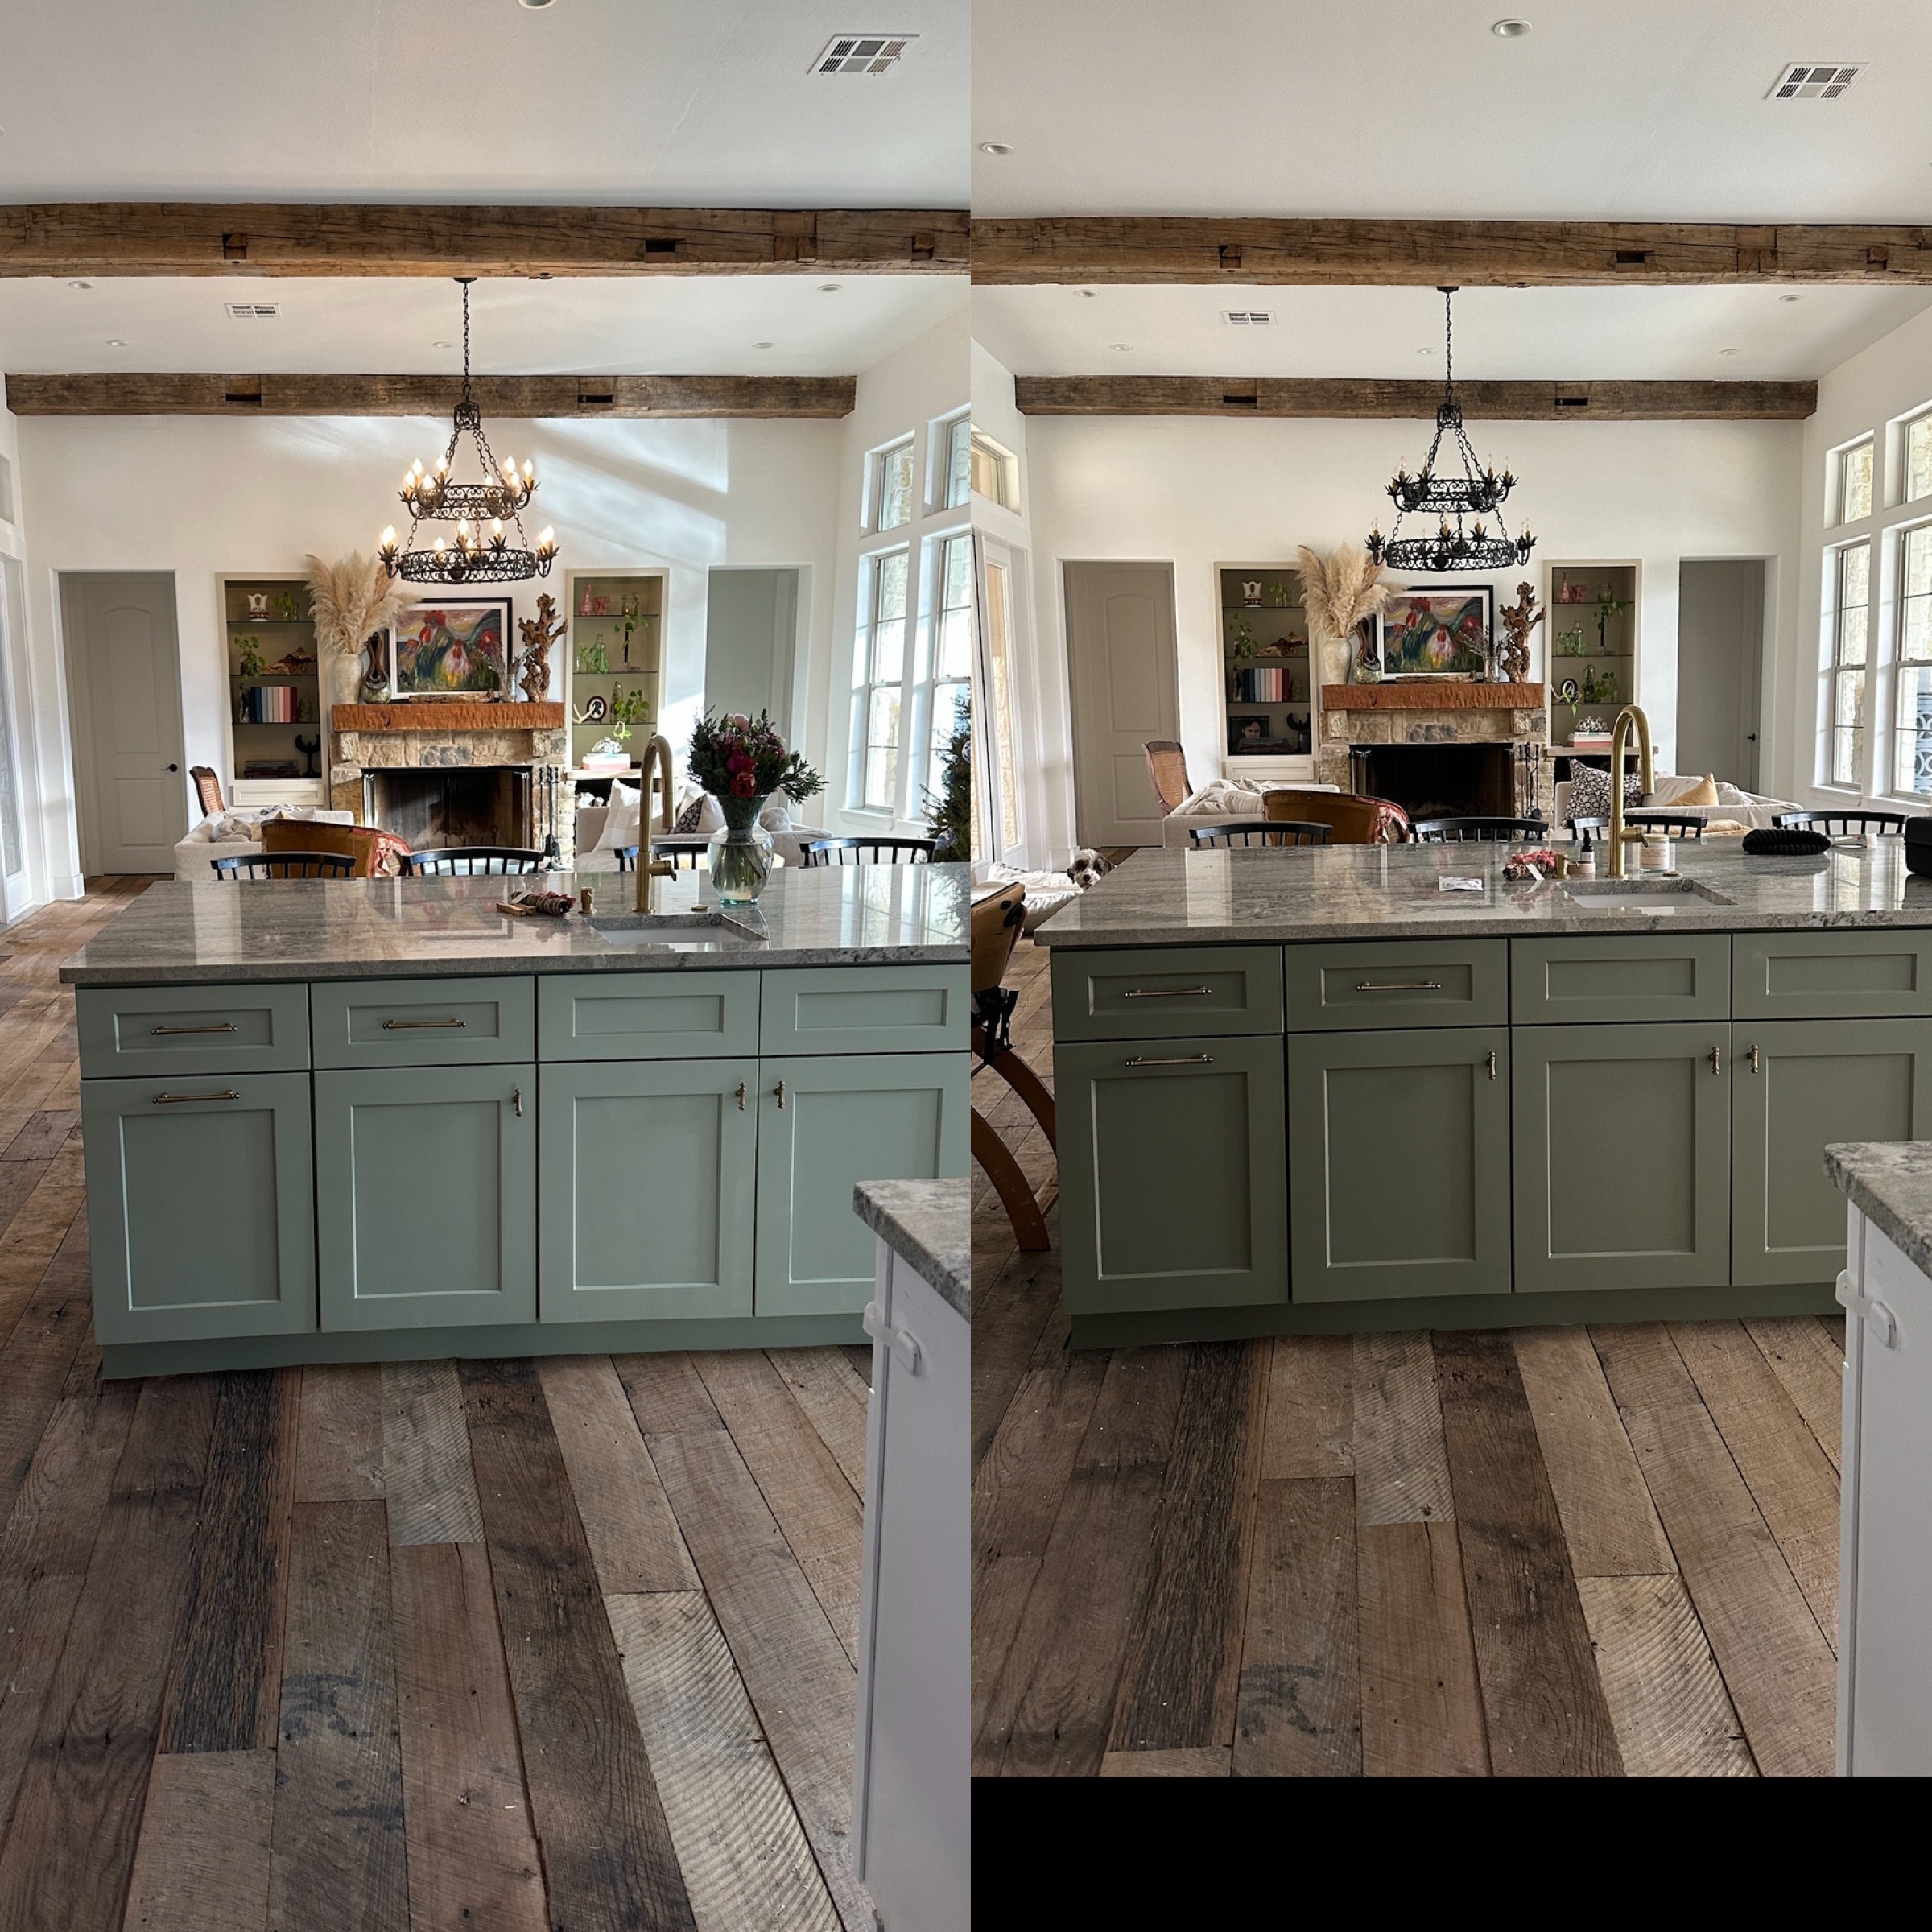
LEFT: Saybrook Sage RIGHT: Treron
The final touch was adding crown molding to the cabinets. I’ve always been bothered by cabinets that don’t reach the ceiling, but with our 12-foot ceilings, raising them wasn’t an option. The crown molding added the ornate, vintage touch I was looking for, tying the whole design together.
Conclusion: A DIY Journey to Remember
By the end of this project, I’ve gained dozens of new skills, a deeper confidence in my taste, and a newfound obsession with DIY. I wake up every day feeling like I’m living in a work of art, and I couldn’t be happier with how the great room turned out. If you want to see videos of the renovation process, head to my YouTube channel.
I’m sure I’m missing a detail or two—if you notice any, please leave them in the comments! I’d also love to hear about your own kitchen renovation experiences.
Before and After
Check out the full before-and-after transformation below—what do you think?
BEFORE
AFTER
All photos taken by @madelineharperphotography
comments +